Arduino: Atmel-Flash-Station
Finally not always using Arduinos:
Every time i nearly finished a project, I'm annoyed about using an arduino again, which uses a lot of space and isn't really necessary. A small stand-alone-controller would totally be enough. While prototyping the Arduino-PCB is a cool thing, but afterwards, when everything is finally assambled, the arduino needs a lot of space, which could be used for other things, like less case.
After some research about how to burn your code onto microcontrollers with an arduino, I went to Conrad (a big computerstore in Germany), to buy all the parts, which I needed for this project:
- 1x Arduino Nano v3
- 1x Atmega 328
- 2x 18pF-22pF Capacitors
- 1x 10μF Capacitors
- 1x 16Mhz Crystal
- 3x 220Ohm Resistors
- 3x LEDs (red, green, yellow)
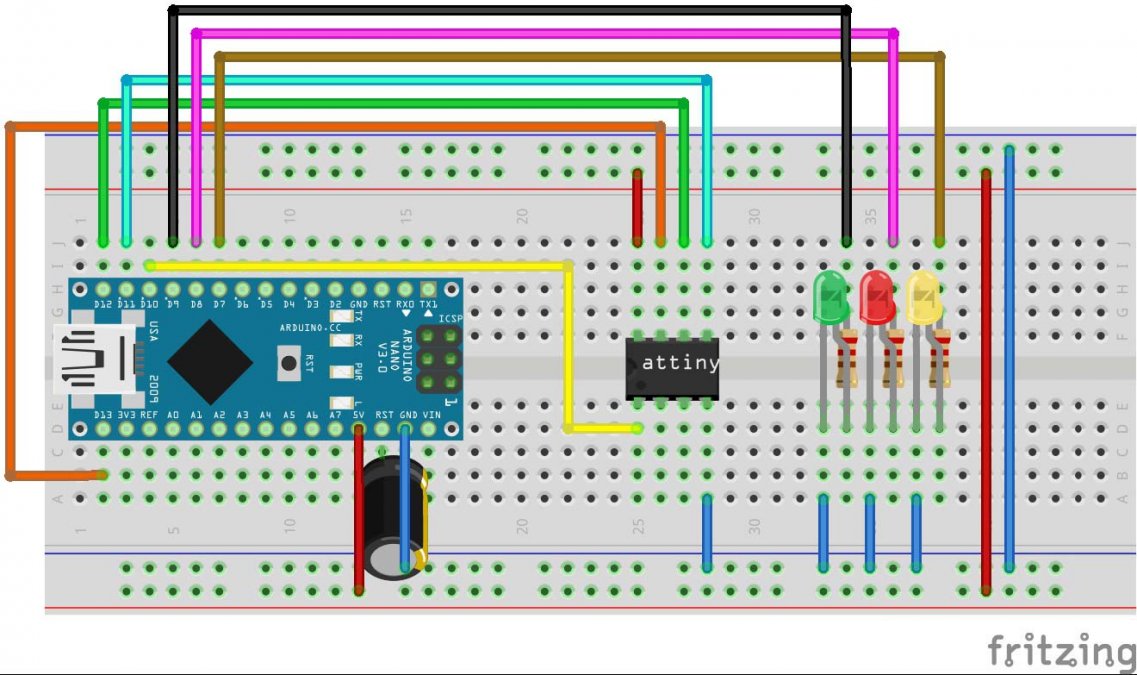
You should put the stuff onto your breadboard like this:
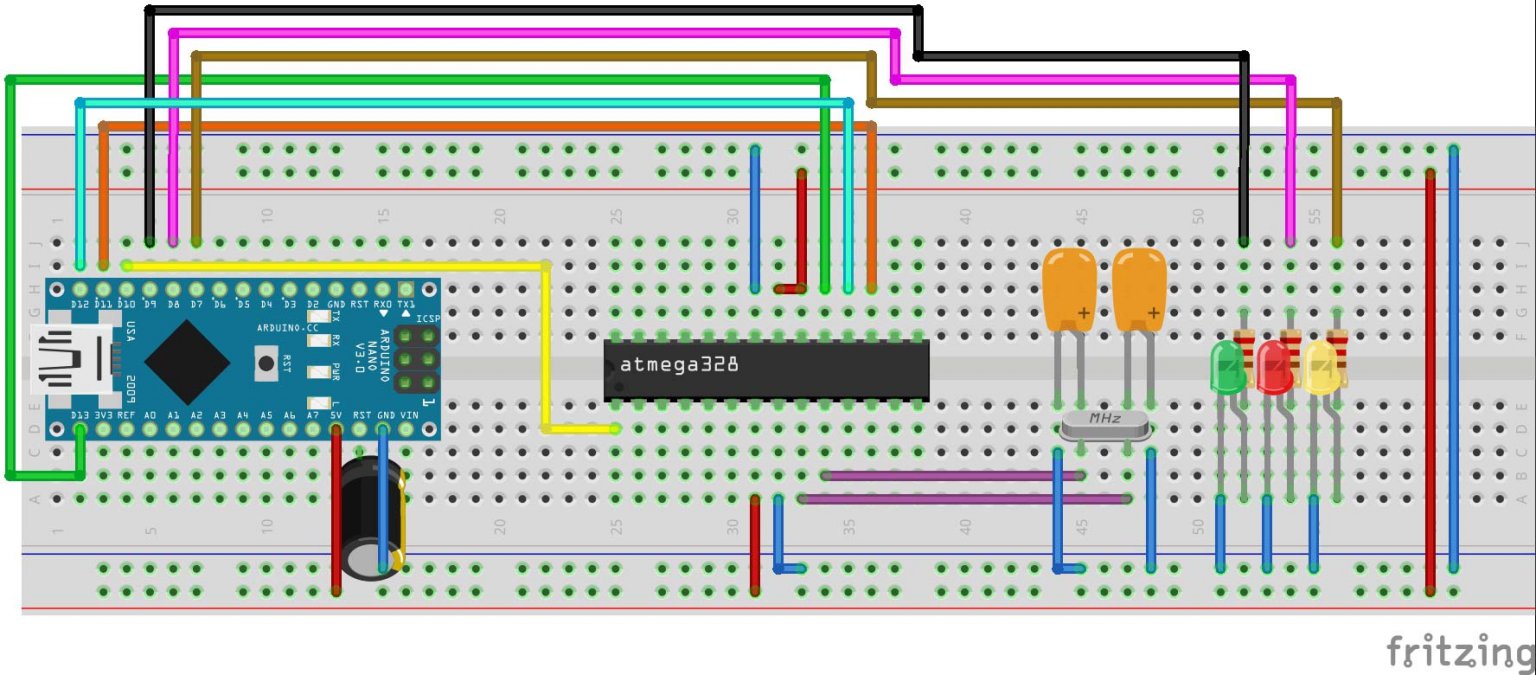
It's important to put the 10μF capacitor between Reset and GND. Without this one, I wasn't be able to flash a single controller.
HINT: For flashing code to the arduino itself, you have to remove the capacitor. If not: Nothing will happen.
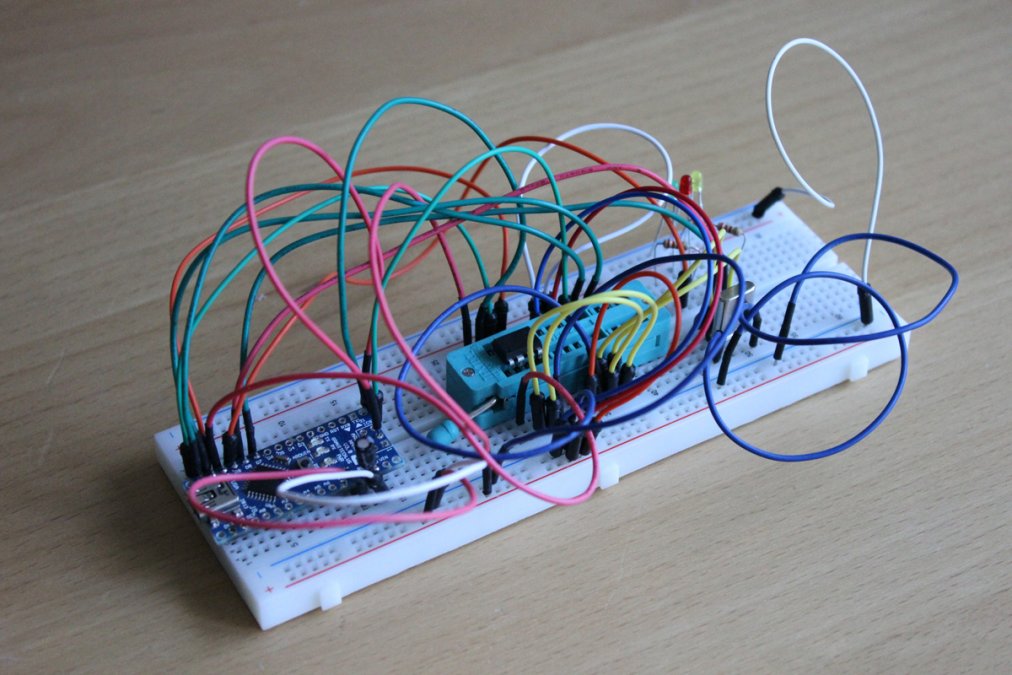
Sorry, but my breadboards never look as clean as in the picture above:
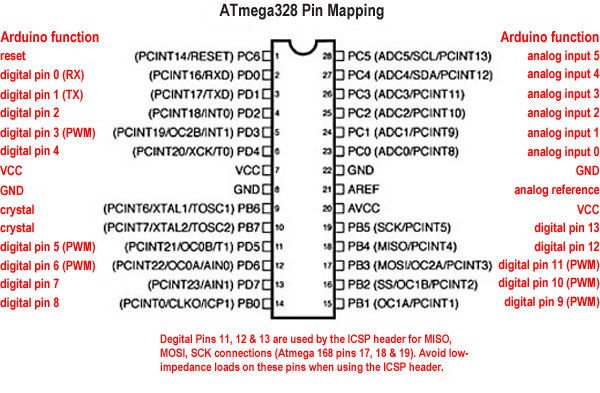
The Atmega's pins are mapped like this:
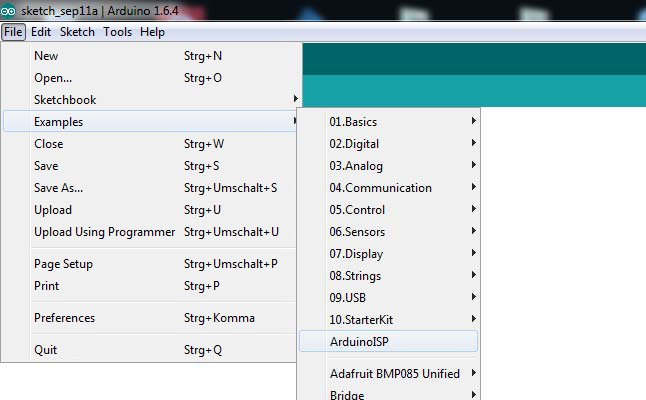
Now you have to flash the "ISP"-Sketch onto the Arduino. This sketch is stored as an example. You will find it in "File -> Examples":
This will work as always:
Choose your Arduino in "Tools", click the right port and upload the sketch.
Now you have to modify the Arduino IDE, to add your Atmel to the boards selection.
Open the boards.txt with you chosen editor.
You'll find the configfile in (arduino folder):
Arduino\hardware\arduino\avr\boards.txt
It seems like something were changed on parsing the file, by the IDE. All examples I found on the net, weren't working anymore. So i tried and red a lot to reassamble a working one:
##############################################################

atmegasa16.name=ATmega328P Stand Alone (Arduino as ISP)

atmegasa16.vid.0=0x2341
atmegasa16.pid.0=0x0043
atmegasa16.vid.1=0x2341
atmegasa16.pid.1=0x0001
atmegasa16.vid.2=0x2A03
atmegasa16.pid.2=0x0043

atmegasa16.upload.tool=avrdude
atmegasa16.upload.protocol=stk500
atmegasa16.upload.maximum_size=32768
atmegasa16.upload.maximum_data_size=2048
atmegasa16.upload.speed=115200

atmegasa16.bootloader.tool=avrdude
atmegasa16.bootloader.low_fuses=0xFF
atmegasa16.bootloader.high_fuses=0XDF
atmegasa16.bootloader.extended_fuses=0x05
atmegasa16.bootloader.unlock_bits=0x3F
atmegasa16.bootloader.lock_bits=0x0F
atmegasa16.bootloader.file=optiboot/optiboot_atmega328.hex

atmegasa16.build.mcu=atmega328p
atmegasa16.build.f_cpu=16000000L
atmegasa16.build.board=AVR_UNO
atmegasa16.build.core=arduino
atmegasa16.build.variant=standard

##############################################################
This text has to be added to the end of the file.
After saving it, restart the Arduino IDE, so the changes will be read in.
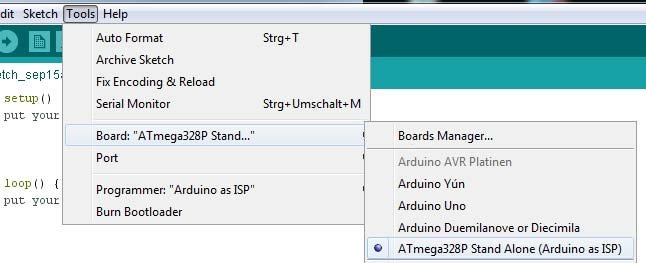
Now you will find the Atmega, as a new entry in "Tools -> Boards":
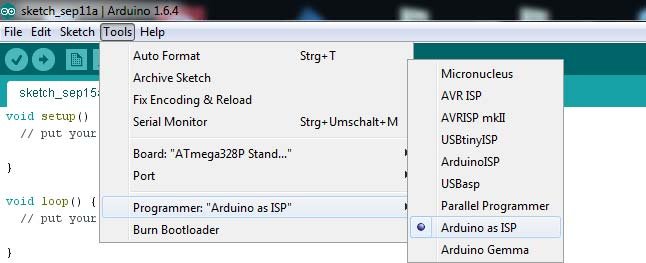
After you clicked the Atmega in "Boards", change the programmer to "ISP":
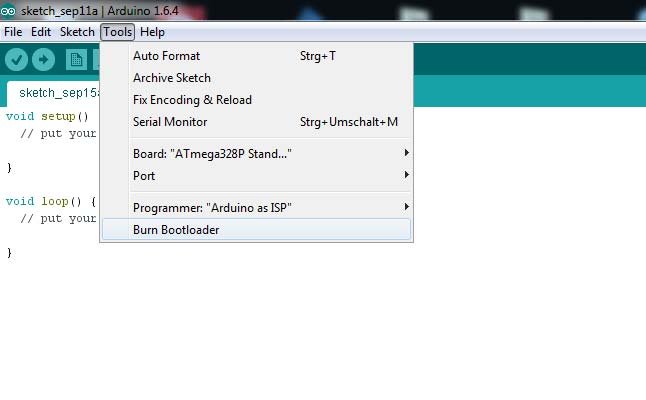
Now you have to write a bootloader onto the Atmega. So just click on "Burn Bootloader" in "Tools".
Just for your information: This will not burn a real bootloader, it will just set some fuses and clock rate:
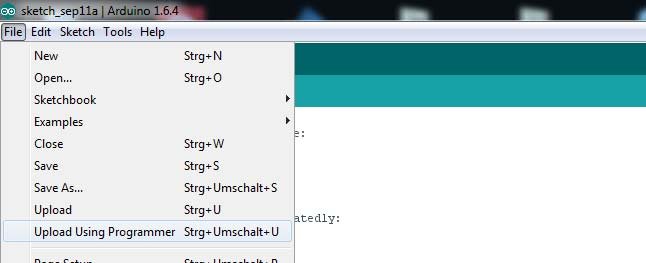
Finished! Yeah! Now you are ready to send your own sketches to the Atmel. You should use the "Upload Using Programmer" function in "File":
Hint: The green LED is showing the heartbeat, orange is RX/TX, red will light up, if an error occures.
Flash an ATtiny
So now you are able to flash an Atmega. But sometimes it doesn't make any sense, to use such a big μC. If you just want to light some LEDs or read sensor's data, the small μCs are the chosen ones:
Okay, they a slower and only have five pinouts, but they are smaller and a lot of cheaper.
So if you want to flash your code to this babies, you have to rearrange some cables at your breadboard:
The pins of an ATtiny-85 are mapped like this:
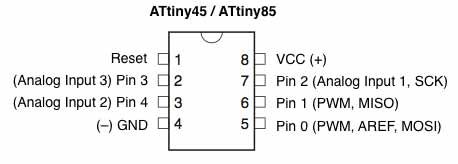
If you want to add an external crystal to the ATtiny, the Pins 2 and 3 are used for that (the ones between Reset and Ground).
Flashing them with your Arduino IDE is a bit more complicated, as using the Atmega, but definitely no black voodoo magic:
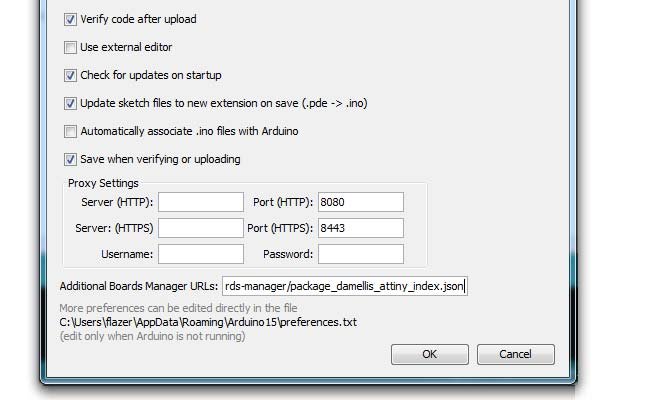
Click on "File -> Preferences" and add the following URL to the end of the field "Additional Boards Manager URLs":
https://raw.githubusercontent.com/damellis/attiny/ide-1.6.x-boards-manager/package_damellis_attiny_index.json
If some URLs are already stored in there, just seperate the URLs by comma.
Now switch to "Tools -> Boards -> Boards Manager" and search for an entry named "attiny". Install the package and restart your IDE. Now are able to choose the ATtiny in "Boards" as well:
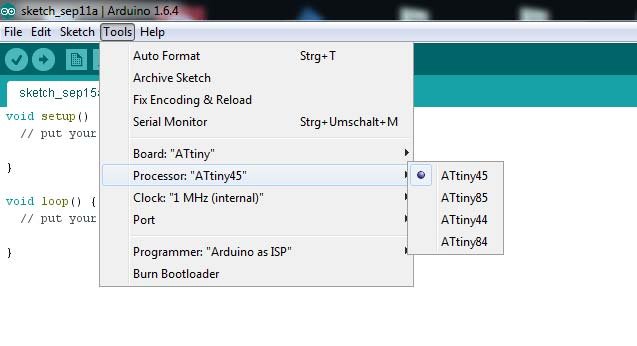
After you clicked onto "ATtiny", you have to specify the type of your ATtiny, by clicking on it within the new displayed submenu.
Now it's the same like before:
Burn the "bootloader" and use your Arduino as an ISP-programmer.
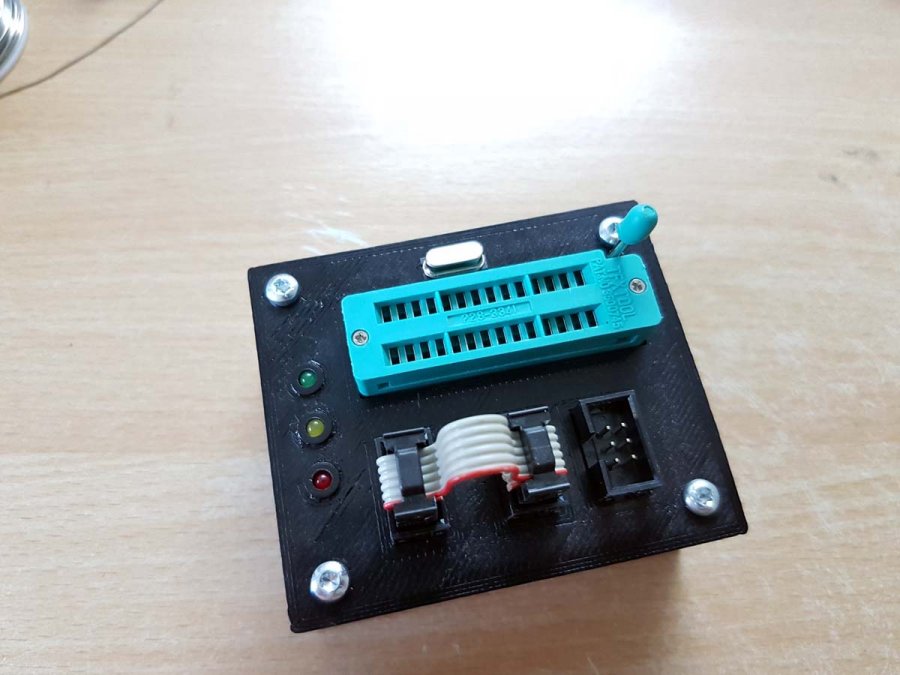
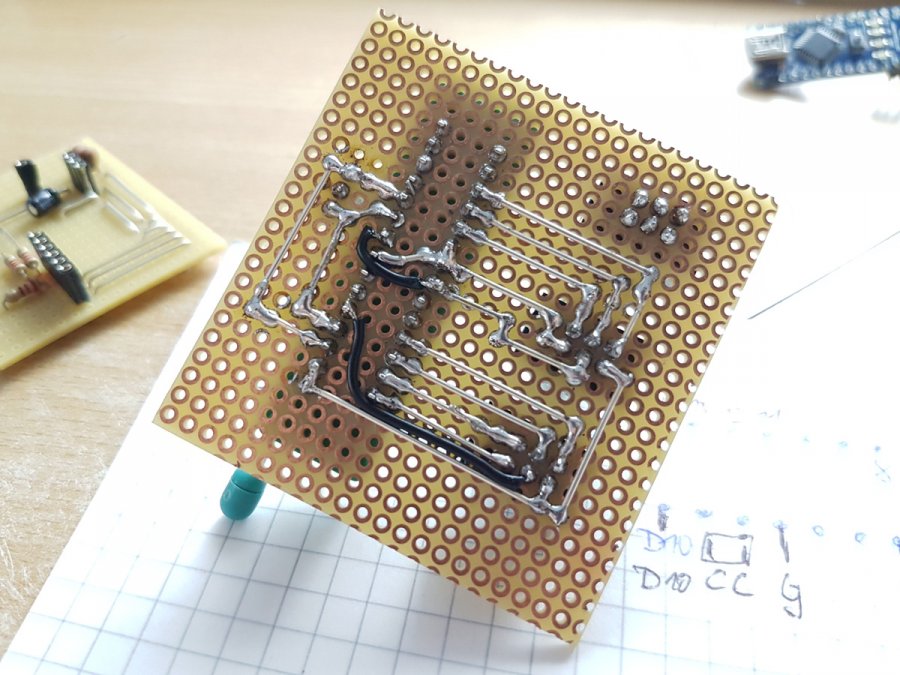
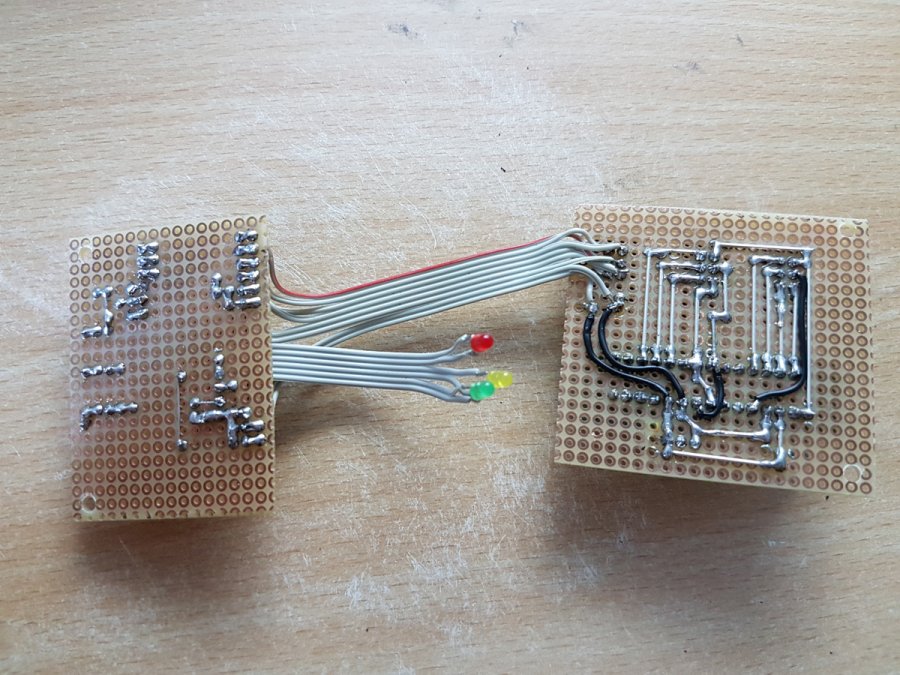
Because I didn't want to leave the stuff on a breadboard, I build a nice, black case for it and soldered everything into a big, fat "blob":


You can download the files, to print the case, from Thingiverse.
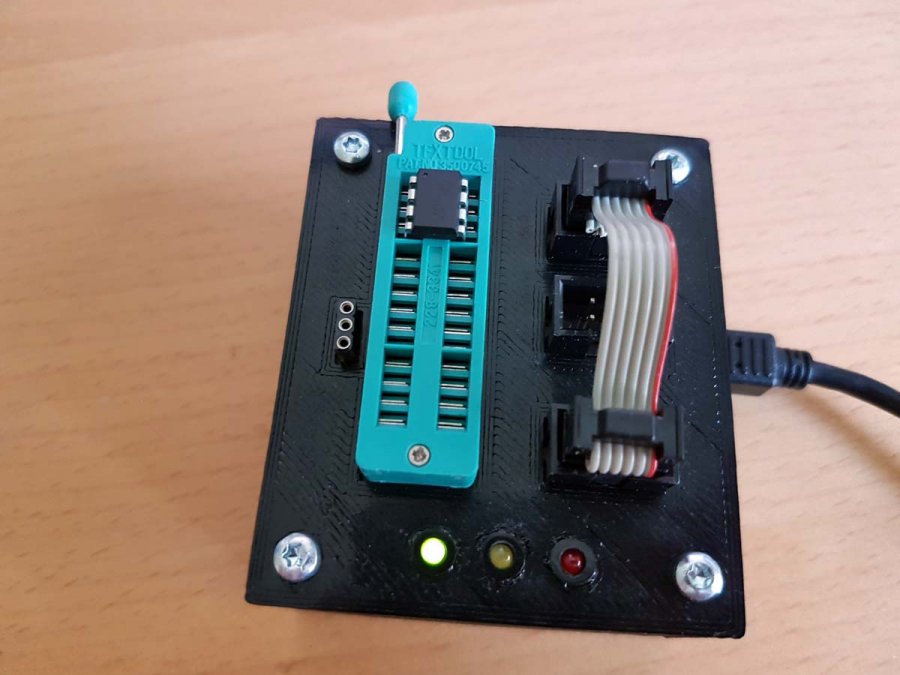
For flashing different controllers, you only have to switch one cable:
The socket place in the middle, is used to flash the Atmega, the socket on top to flash an ATtiny.
It's also possible to change the crystal. Depends on wether you want to use one, or not.
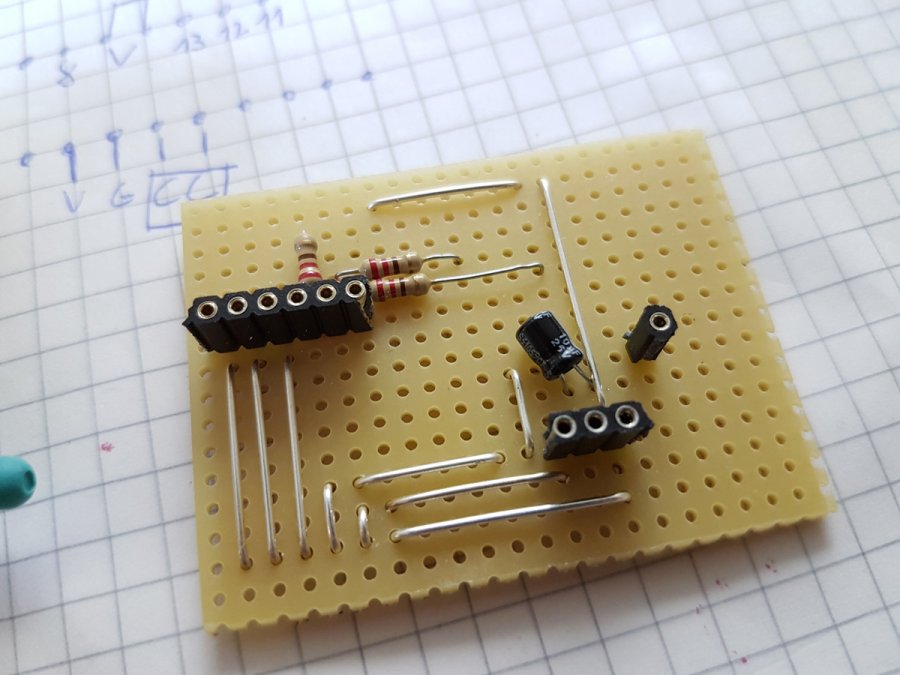
Here some pictures which are showing my godlike soldering-skills ;) :

And because of "reasons", I did a small video about building this station (in german only):