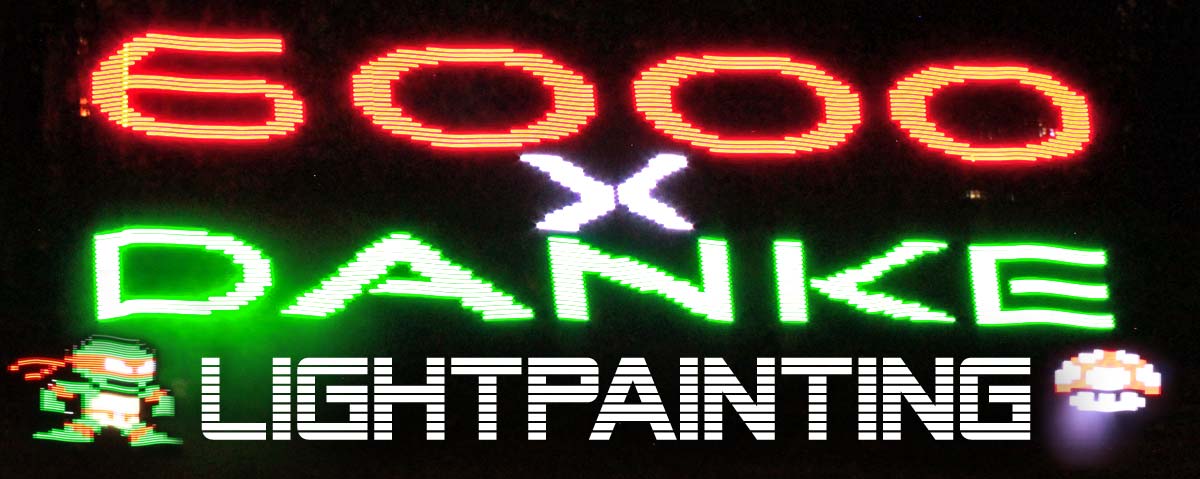
Let's do some art. Lightpainting
Writing and painting with light. This idea is not a new one:
You just take a camera, switch it to longtime exposure and paint with a flashlight, or LED, some characters in front of it. This works properly, if you are able to draw. I'm not.
So I just stood by admiring those people, but knew I will never be able to do this.
Two years ago, while I visited the 30c3 (Chaos Computer Congress), there were some guys from Blinkinlabs. They sold some bags full LED stripes. I bought on e myself anf found out, that you are able to blink own images with it. But unfortunately mine broke after some days of testing. They are not (very) waterproof...
Since nearly ever and millions of other ideas later, the broken strip was stowed in some drawer and got dusty. I could have repaired it or build a new one, but I set the priority to "very low".
Since the beginning of this year, I sometimes shoot a video with my GoPro, while i do my projects and upload the result, after some editing, to Youtube. Nearly nobody cared about. But it is a lot of fun for myself and some people visit my blog, after they saw one of my clips. I get some clicks. Which is nice. I'm fine with it.
But this changed rapidly, when I upload my first project for "Kliemannsland":
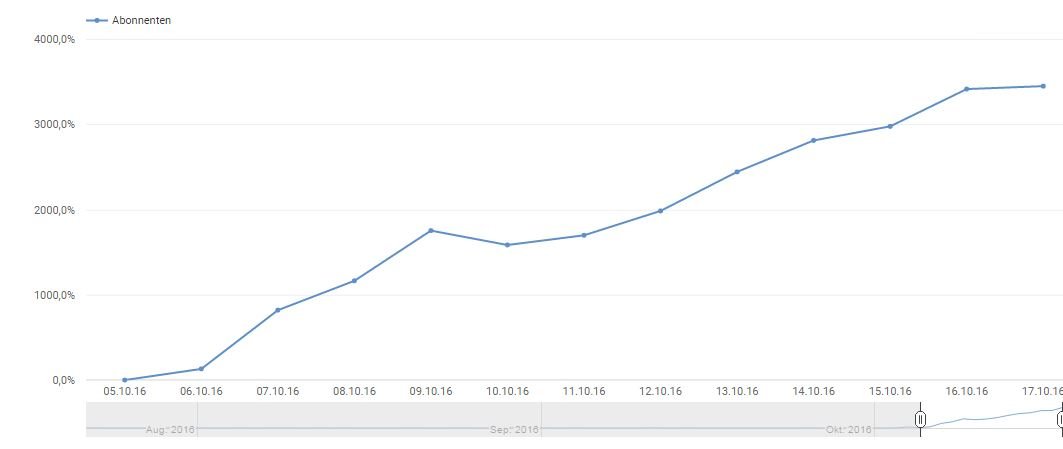
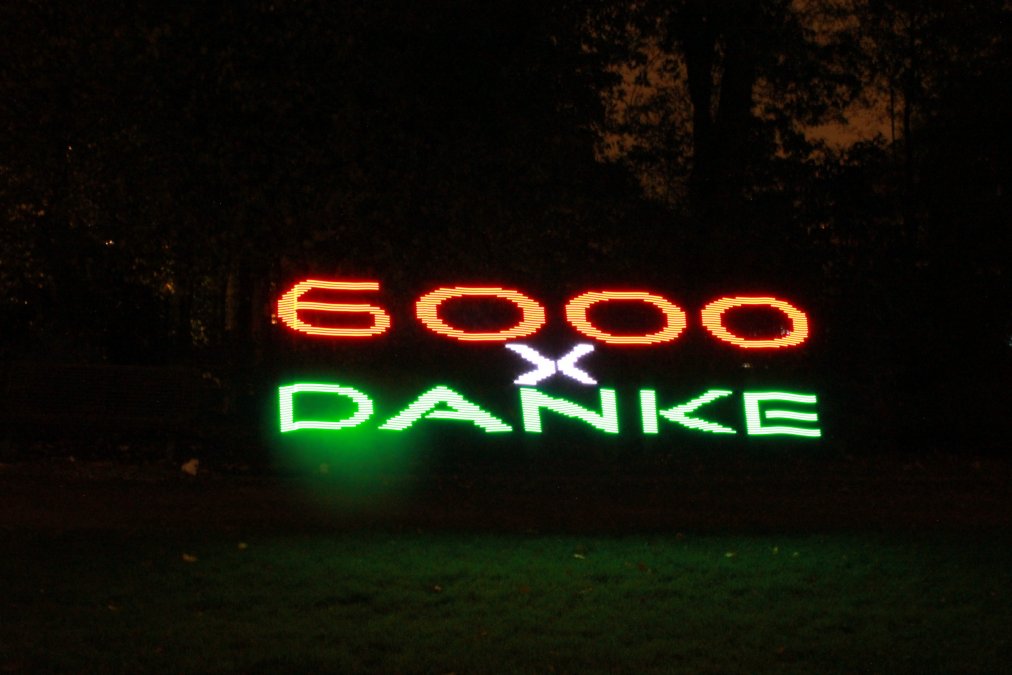
It got some likes "likes" on Twitter and people started watching it. Suddenly it rains subscribers and my videos are being watched. What a great feeling! There are unknown people out there, watching my work, asking questions, liking the stuff and giving advices (and even insulting me, but okay: It's youtube. Trolls and haters...). Within a week this stuff gained over 6000 subscribers out of 250 before:
At this time I thought, this will be the maximum and decided to do a small "Thank You"-video (to be honest, meanwhile there are about more then 10.000 subscribers). It should be a small and short project. Just a few hours of work, maximum. Short preperation. Just something short. I remembered the old LED-Strip: "It would be nice, to say: Thank you, with a drawn picture!"
Aber I took a look at the LED-strip, I found out, that it has cracked on multiple places, additionally. It seems I had creased it somehow whith in the last years within the drawer. Gnar. So I have to build a new one. It's just an Arduino with some lights.
I was lucky, because I had everything that was needed:
BOM:
- 1x Arduino Nano
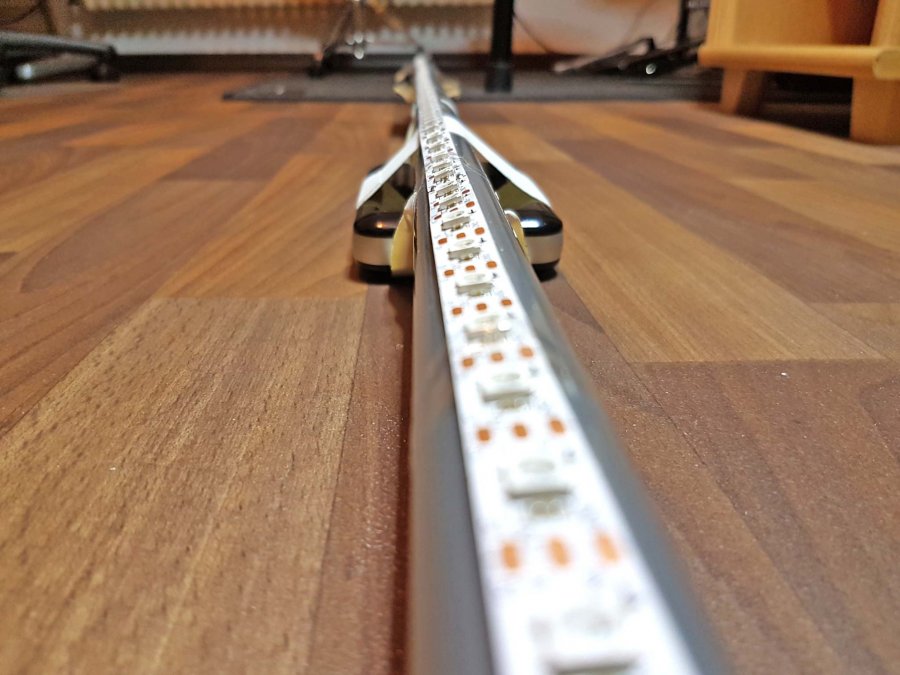
- 60x WS2812B (RGB-LED Strip)
- 1x Button
- 1x LED
- 1x Resistor (220 Ohm)
- 1x Resistor (200 Ohm)
- 1x Resistor (4,7 kOhm)
- 1x Capacitor (1000 µF, 6.3V (or bigger)
- 1x USB-Jack
- 1x Powerbank
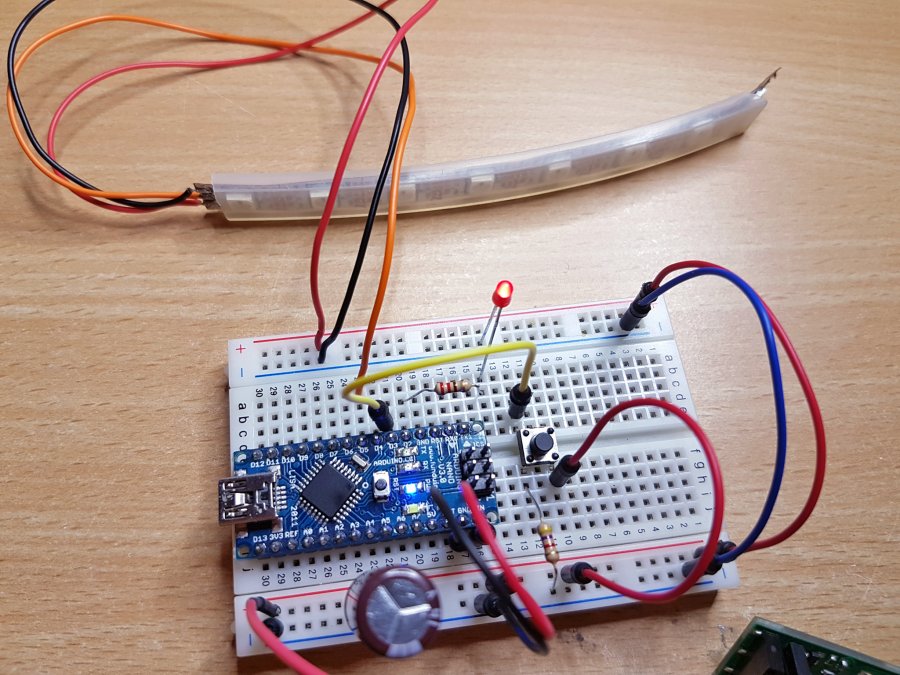
This pieces have to be arranged on a breadboard like this:
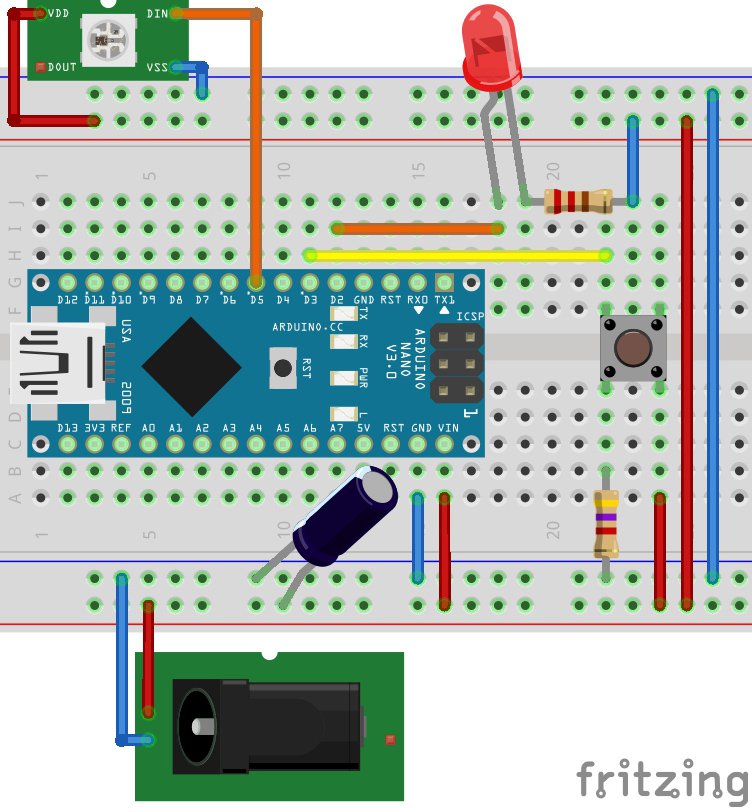
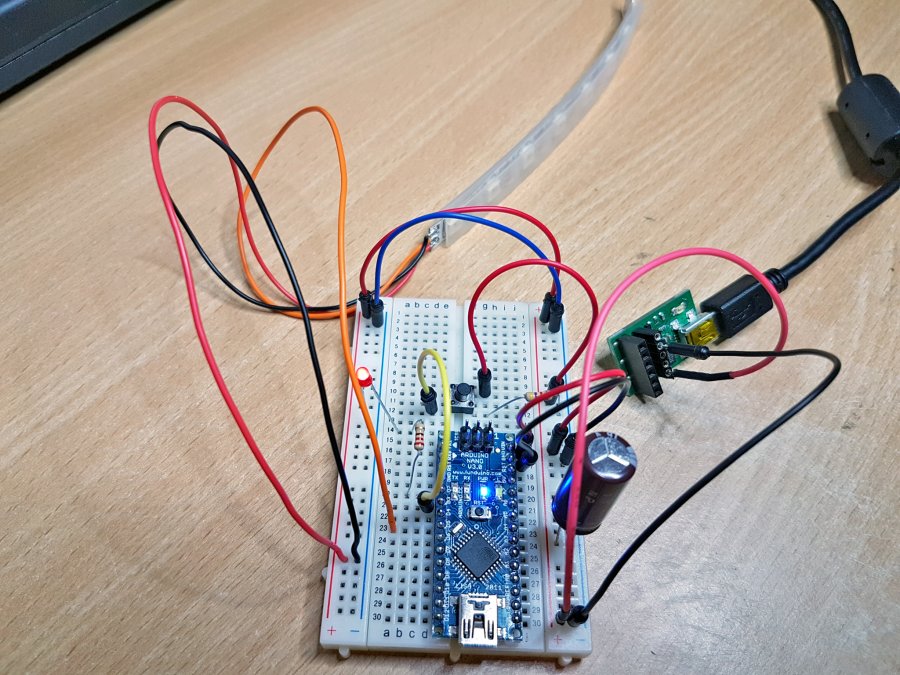
Short explanation:
The button is used to start or end the animation. It's connected via a Pull-Up-Resistor (~4,7 kOhm) to the board. The led shows, wether the Arduino is ready to start the animation or not. Be sure to add a 220 Ohm resistor, when you add it to the breadboard.
I added a capacitor just to be sure, the LED-strip won't get damaged, caused by some voltage fluctuations. The strip just need it's 5 volts and get it's data just from one datapin.
How does it work
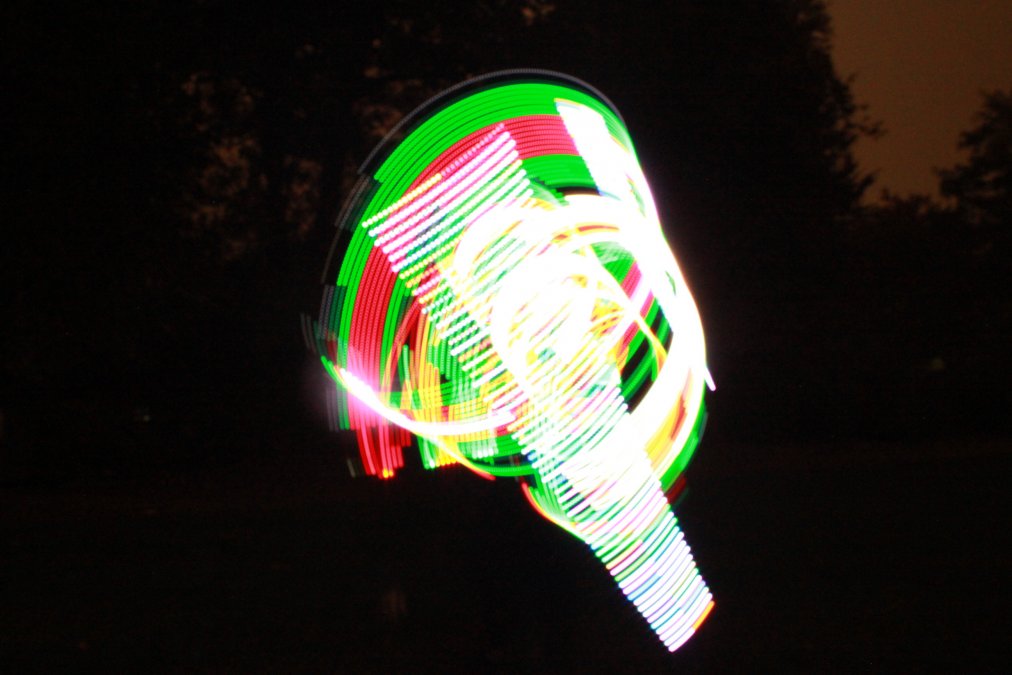
This is easy: You take a picture with a height of 60 pixels and cut it, instead into rows, into columns. These information have to be stored onto an Arduino and have to be blinked, column by column by the strip. You just have to glue the strip, arduino ... everything ... onto some sort of stick/bar whatever and walk with this construction in front of a camera. Which is operating and shooting in "long time exposure"-mode.
Pattern Paint
Of course: You can write your own code to generate the information for each column, or you use a compiled software. I decided to use the already written one, called Pattern Paint. It's small and OpenSource:
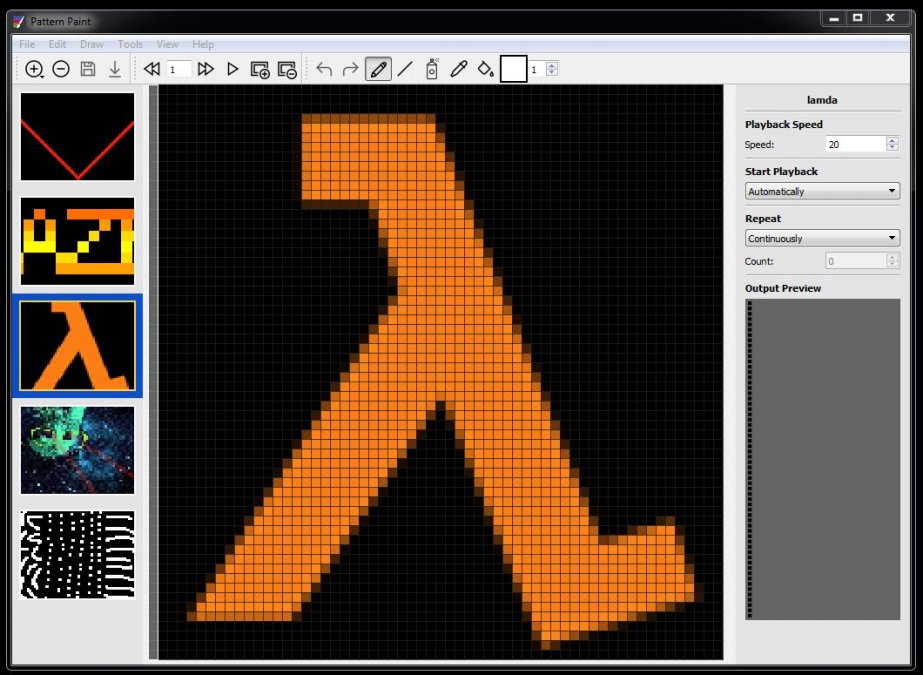
Converting images:
- Choose "Blinky Tape":

- "File -> Open -> Scrolling Pattern". Choose your 60 pixel height image, and open it:
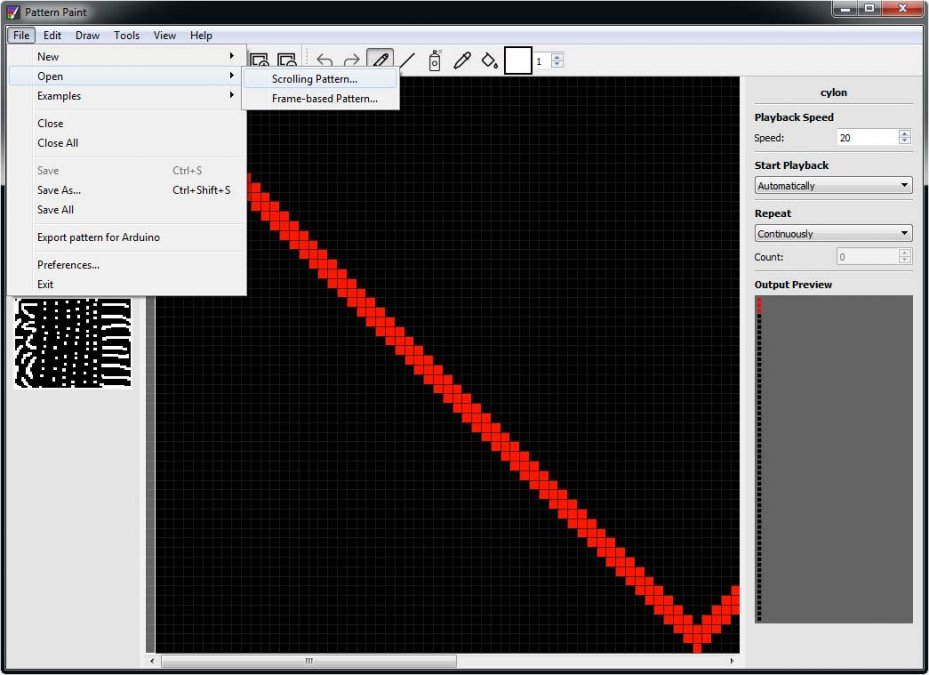
- If the image loaded successfully, you can export it already and generate a so called "Header" file:
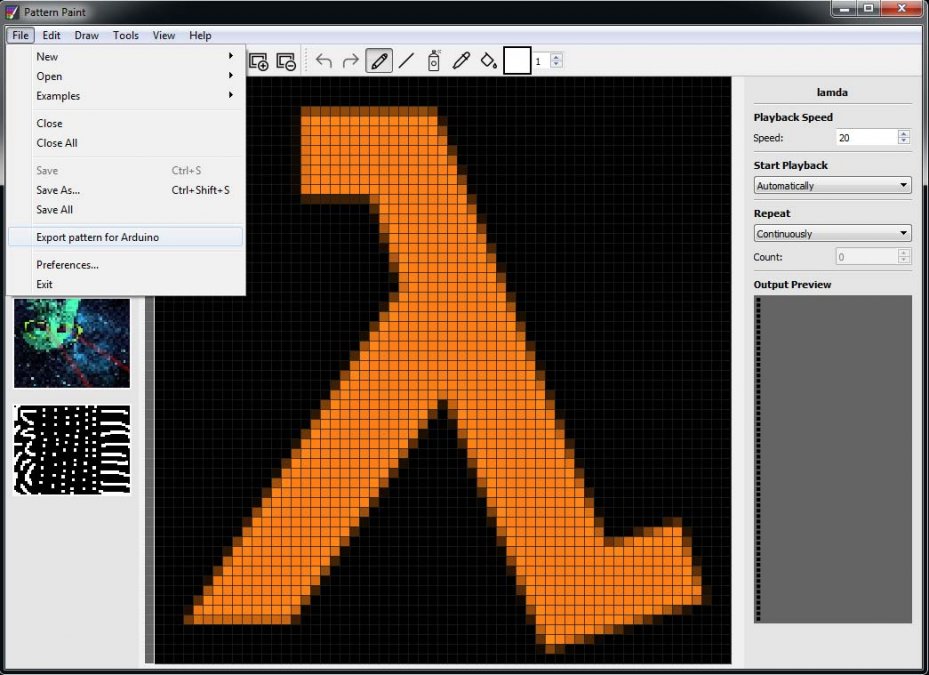
Finished. Pattern Paint has done it for you.
Okay. You have to get it working on your Arduino..
Just some Arduinostuff
To get the stuff done, i downloaded a little help. It's called FastLED. This is a small library which gives you some easy ways to handle the LEDs. You don't have to invent everything twice. So: Download it and store it into the Arduino (IDE) library folder. (This path differs and depends on the OS you have. If you use windows: It's in the user's Documents. Mac OS will store it in the app's folder.)
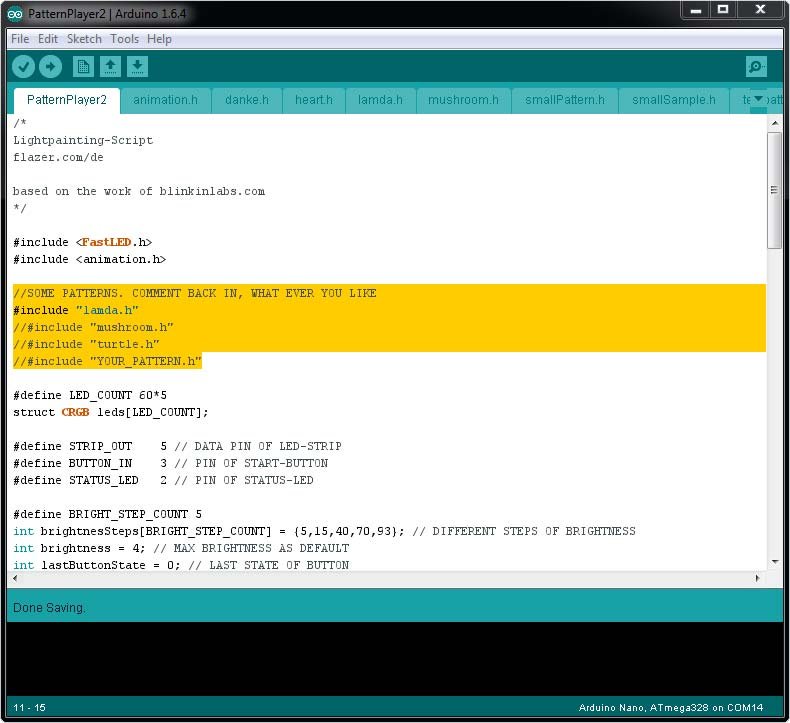
This is my written code as an example:
/*
Lightpainting-Script
flazer.com/de
based on the work of blinkinlabs.com
*/
#include <FastLED.h>
#include <animation.h>
//SOME PATTERNS. COMMENT BACK IN, WHAT EVER YOU LIKE
#include "lamda.h"
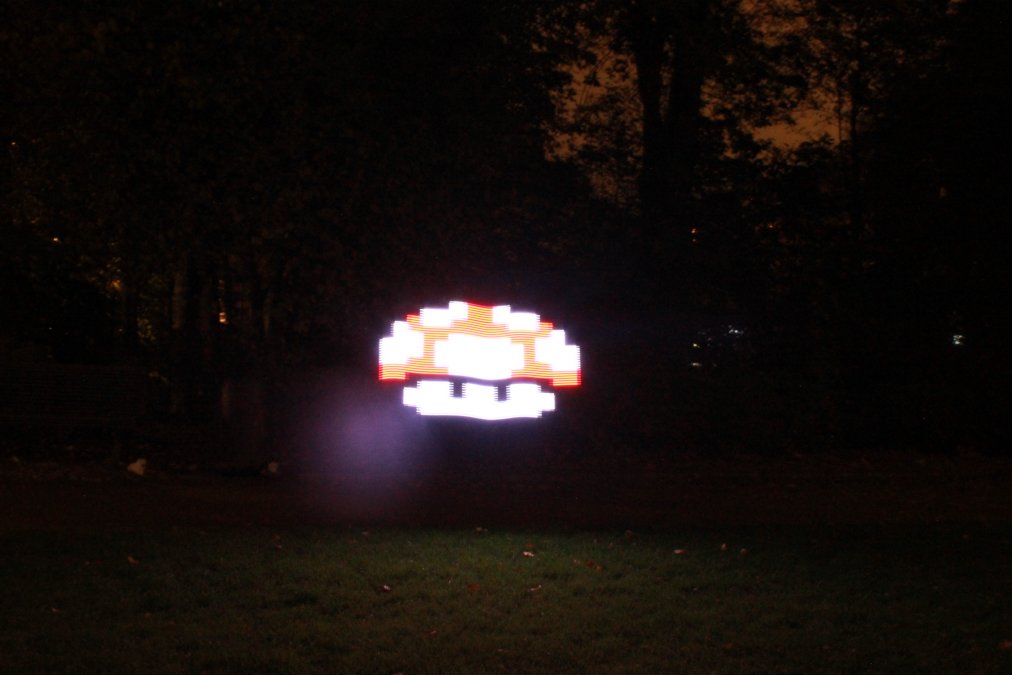
//#include "mushroom.h"
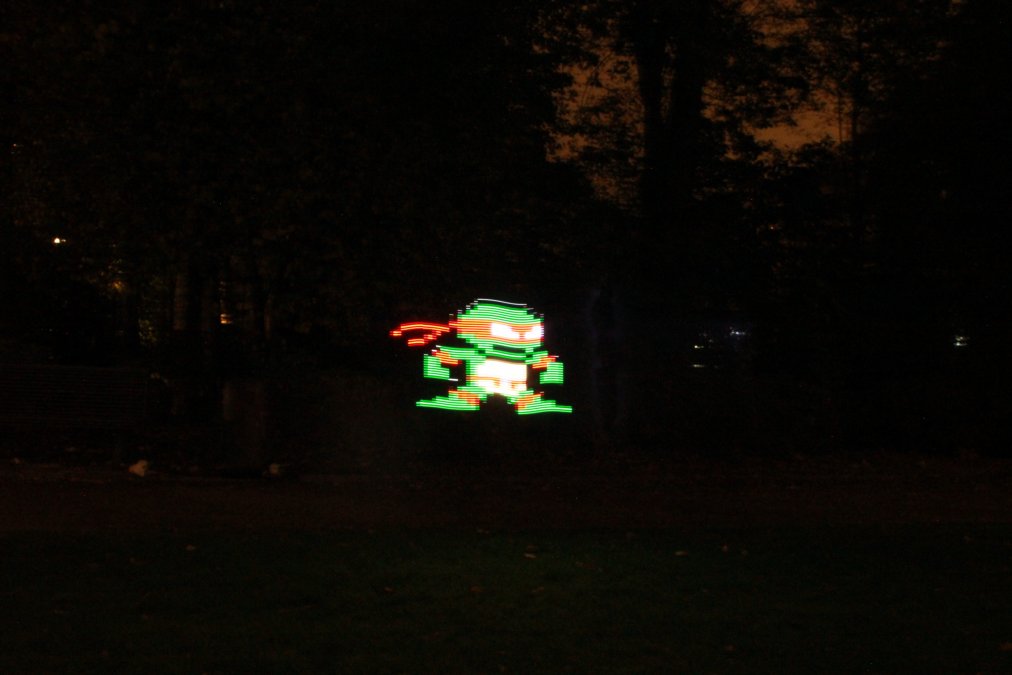
//#include "turtle.h"
//#include "YOUR_PATTERN.h"
#define LED_COUNT 60*5
struct CRGB leds[LED_COUNT];
#define STRIP_OUT 5 // DATA PIN OF LED-STRIP
#define BUTTON_IN 3 // PIN OF START-BUTTON
#define STATUS_LED 2 // PIN OF STATUS-LED
#define BRIGHT_STEP_COUNT 5
int brightnesSteps[BRIGHT_STEP_COUNT] = {5,15,40,70,93}; // DIFFERENT STEPS OF BRIGHTNESS
int brightness = 4; // MAX BRIGHTNESS AS DEFAULT
int lastButtonState = 0; // LAST STATE OF BUTTON
int run_mode = 0; // CURRENT RUN MODE (BLINKING OR NOT)
int frameDelay = 30; // Number of ms each frame should be displayed.
int framesDone = 0; // COUNTER OF FINISHED FRAMES (COLUMNS)
boolean repeatAnimation = true; //SHOULD THE ANIMATION REPEAT
void setup()
{
LEDS.addLeds<WS2812B, STRIP_OUT, GRB > (leds, LED_COUNT);
LEDS.showColor(CRGB(0, 0, 0));
LEDS.setBrightness(brightnesSteps[brightness]);
LEDS.show();
pinMode(BUTTON_IN, INPUT);
pinMode(STATUS_LED, OUTPUT);
setLED(1);
}
void loop() {
button();
if(run_mode == 1) {
animation.draw(leds);
framesDone++;
}
//Stop all
if(!repeatAnimation && framesDone >= frameCount) {
stop();
}
delay(frameDelay);
}
void stop() {
animation.reset();
run_mode = 0;
framesDone = 0;
blackout();
setLED(1);
}
void button() {
int buttonState = digitalRead(BUTTON_IN);
if((buttonState != lastButtonState)) {
if(buttonState == 0) {
if(run_mode > 0) {
stop();
}else {
run_mode = 1;
setLED(0);
}
}
}
lastButtonState = buttonState;
}
void blackout() {
for(int led = 0; led < LED_COUNT; led = led + 1) {
leds[led] = CRGB(0, 0, 0);
}
LEDS.show();
}
void setLED(int status) {
digitalWrite(STATUS_LED, status);
}
Hint: The code above will not work. The generated header-files are still missing.
You can download the files, I've build for testing purposes here.
Just unzip them and place them directly into the folder, where you have stored the script from above.
Additionally you have to add a file called "animation.h". You can either copy the file from here directly:
#ifndef ANIMATION_H
#define ANIMATION_H

#include <Arduino.h>
#include <FastLED.h>

class Animation {
 public:
  typedef enum {
    RGB24 = 0,
    RGB565_RLE = 1,
#ifdef SUPPORTS_PALLETE_ENCODING
    INDEXED = 2,
    INDEXED_RLE = 3
#endif
  } Encoding;

  // Initialize the animation with no data. This is intended for the case
  // where the animation will be re-initialized from a memory structure in ROM
  // after the sketch starts.
  Animation();

  // Initialize the animation
  // @param frameCount Number of frames in this animation
  // @param frameData Pointer to the frame data. Format of this data is encoding-specficic
  // @param encoding Method used to encode the animation data
  // @param ledCount Number of LEDs in the strip
  // @param frameDelay Number of milliseconds to wait between frames
  Animation(uint16_t frameCount,
            PGM_VOID_P frameData,
            Encoding encoding,
            uint16_t ledCount,
            uint16_t frameDelay);

  // Re-initialize the animation with new information
  // @param frameCount Number of frames in this animation
  // @param frameData Pointer to the frame data. Format of this data is encoding-specficic
  // @param encoding Method used to encode the animation data
  // @param ledCount Number of LEDs in the strip
  // @param frameDelay Number of milliseconds to wait between frames
  void init(uint16_t frameCount,
            PGM_VOID_P frameData,
            Encoding encoding,
            uint16_t ledCount,
            uint16_t frameDelay);

  // Reset the animation, causing it to start over from frame 0.
  void reset();

  // Draw the next frame of the animation
  // @param strip[] LED strip to draw to.
  void draw(struct CRGB strip[]);

  uint16_t getLedCount() const;
  uint16_t getFrameCount() const;
  uint16_t getFrameDelay() const;

 private:
  uint16_t ledCount;              // Number of LEDs in the strip
  uint16_t frameCount;            // Number of frames in this animation
  uint16_t frameDelay;            // Milliseconds to wait between frames

  Encoding encoding;              // Encoding type
  PGM_VOID_P frameData;           // Pointer to the begining of the frame data

  uint16_t frameIndex;            // Current animation frame
  PGM_VOID_P currentFrameData;    // Pointer to the current position in the frame data

#ifdef SUPPORTS_PALLETE_ENCODING
  uint8_t colorTableEntries;      // Number of entries in the color table, minus 1 (max 255)
  struct CRGB colorTable[256];    // Color table

  void loadColorTable();          // Load the color table from memory
#endif

  typedef void (Animation::*DrawFunction)(struct CRGB strip[]);
  DrawFunction drawFunction;

  void drawRgb24(struct CRGB strip[]);
  void drawRgb565_RLE(struct CRGB strip[]);

#ifdef SUPPORTS_PALLETE_ENCODING
  void drawIndexed(struct CRGB strip[]);
  void drawIndexed_RLE(struct CRGB strip[]);
#endif
};

#endif
... or take a look at the git repo from Blinky-Tape.
If you did everything right, the script is able to compile and will blink the symbol "lambda" in an endless loop.
A small hack to go:
The generated pattern will not work. This is a problem caused by an update of FastLED. Maybe Pattern Paint was forgotten to update, or isn't maintained anymore. I really don't know. So I fixed PatternPaint with some hacks, but found a better and much cleaner way afterswards to get this stuff to work:
Change the following first line in the generated h-file:

const uint8_t animationData[] PROGMEM = {

Replace it with:

const int frameCount = 60;
const uint8_t animationData[] PROGMEM = {

"frameCount" is the amount of columns.

The last line has to be edited as well:

Animation animation(114, animationData, ENCODING_RGB24, 60);

Replace it:

Animation animation(frameCount, animationData, Animation::RGB24, 60, 33);

("60" is the height of the strip)
Now you can add the file to your .ino-Script. That means:
Comment the lamda.h out and YOUR_PATTTERN.h back in. Replace the "YOUR_PATTERN" with your filename:
You are able to compile and upload the script! Yeah!
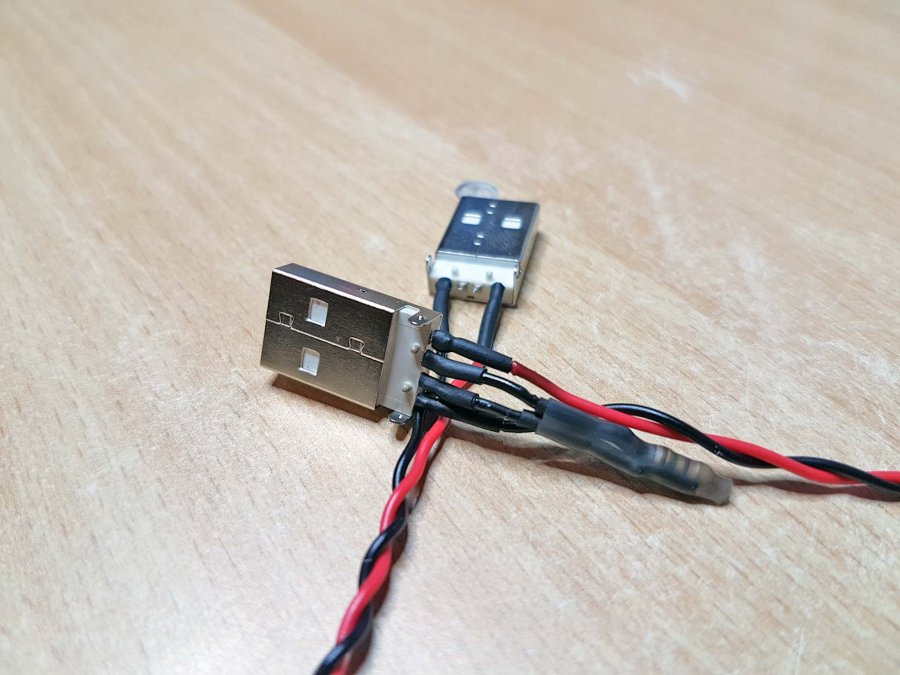
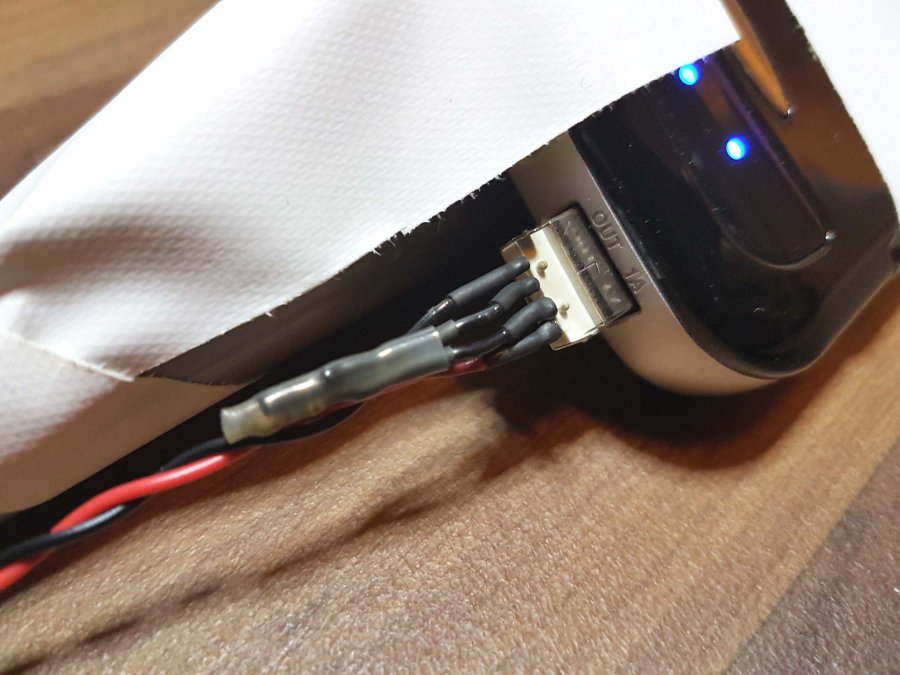
Powerbank
After I nearly finished everything, I realised, I have to add some sort of "powerstation" to it, when I go outside. It looks incredible stupid to use a cable reel outside and it's hard to handle. So I took the big "anker"-Powerbank and connected it. But nothing happend. After some googling I found out, that USB-Charger are telling the powersource, they are a what they are, by an 200Ohm (or less) resistor between their datapins. Perfect. I added a resistor with some shrinking tube to the USB-Jack and it worked! Everything is blinking and moving.
Stick aka broomstick
After I got everything to work, nearly 9 hours of work later, it was almost midnight. But I really wanted to test it this day. I decided myself to go the easy, more hacky way. This time I didn't print a nice construction or thought a lot about a nice way to hold everything in my hands while I'm walking. I just used a lot of Duct-Tape.
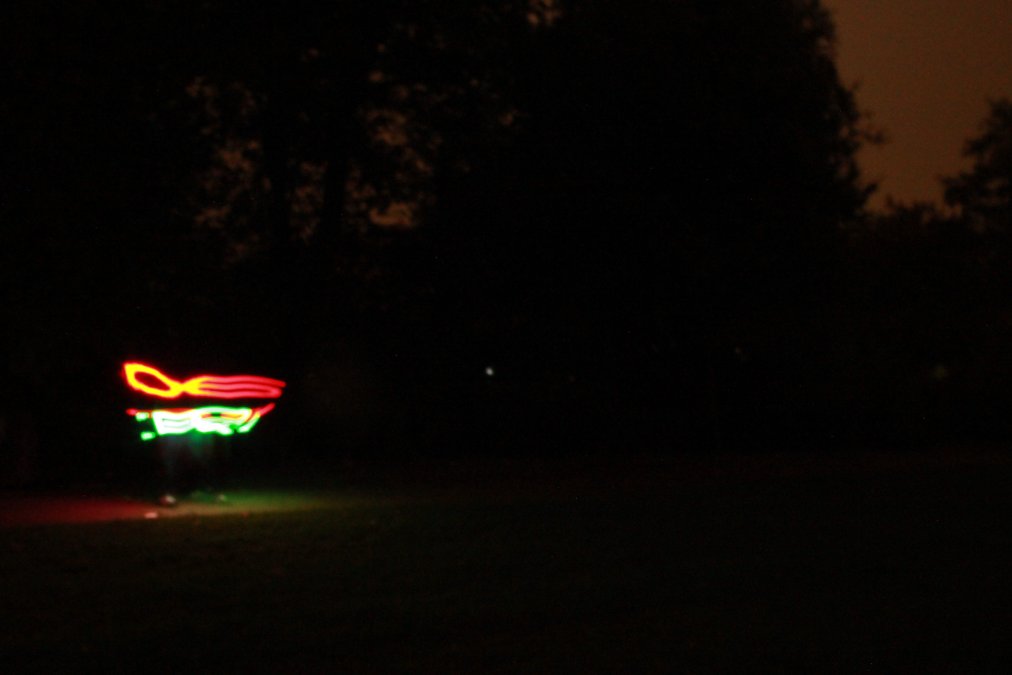
Result: A little bit risky and bizarre, but it will do it's work. Aaaand it's dark outside, anyways. Nobody will see the mess:

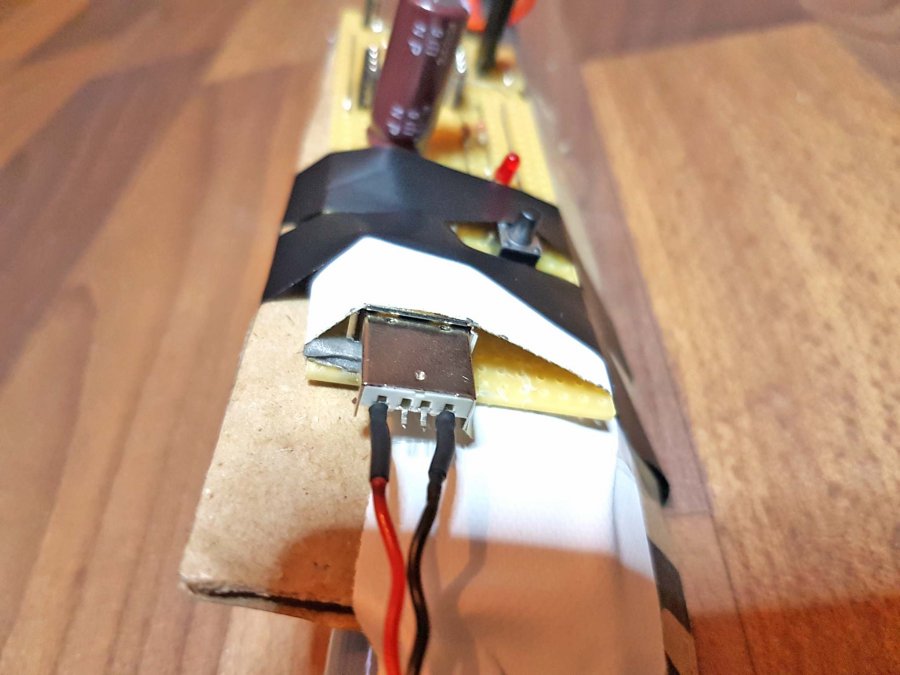

I like the result for this kind of construction:


Ah. And the video I uploaded to Youtube afterwards, of course: