RFID Candy Box + Twitter
Christmas is coming. The pre-christmas season has started. Sweets everywhere. It doesn't matter, if it's classic chocolate, marzipan potatoes, baked goods or gingerbread: Everything, everywhere! Everything is within easy reach, waiting to be eagerly devoured.
Every year i swear myself, to not eat this much. But every time i lose. Every time I lie on the couch, nearly sick, swearing to do better next year. Not this time. This year i will build some prevention:
A crate, which I have to open with a RFID Token, just three times a day. Haha! Take this! Future me!
Some weeks ago I started playing around with a RFID module, I bought because it sounds interesting. I just wanted to find out, how they work, how I can talk to them and how I read and write data from/to cards. But I couldn't find a good use case for it. My landlord wouldn't like it, if I start to manipulate, I mean: refactor our door bell. Peasant!
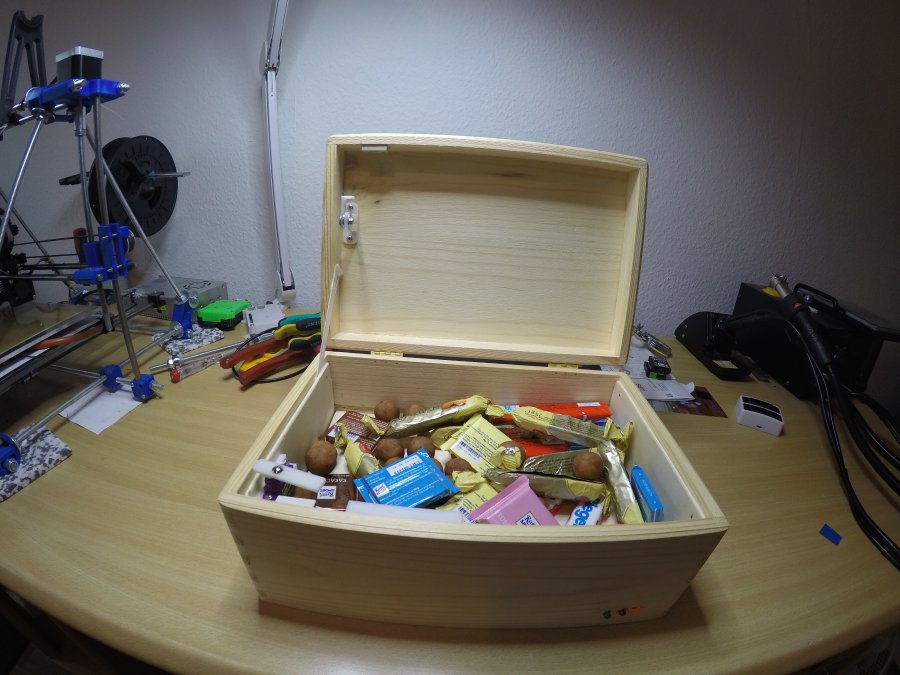
Since a few weeks I have to drive some long distances to work twice a week. So I have a lot of time to think about stuff. So I had the idea of building a candy box, which just opens with a RFID token.
After some sketches, I decided to hide the electronics below a second bottom. Between the surfaces I will hide an arduino, which will send the requests to a controlserver. The microcontroller will spin a servo motor to the right, so I'm able to open the lid. If the lid gets closed again, the controller will notice by reading a reedsensor and will lock it again.
I used the following components:
- Arduino with WIFI (ESP8266) bsp: WeMos D1 mini
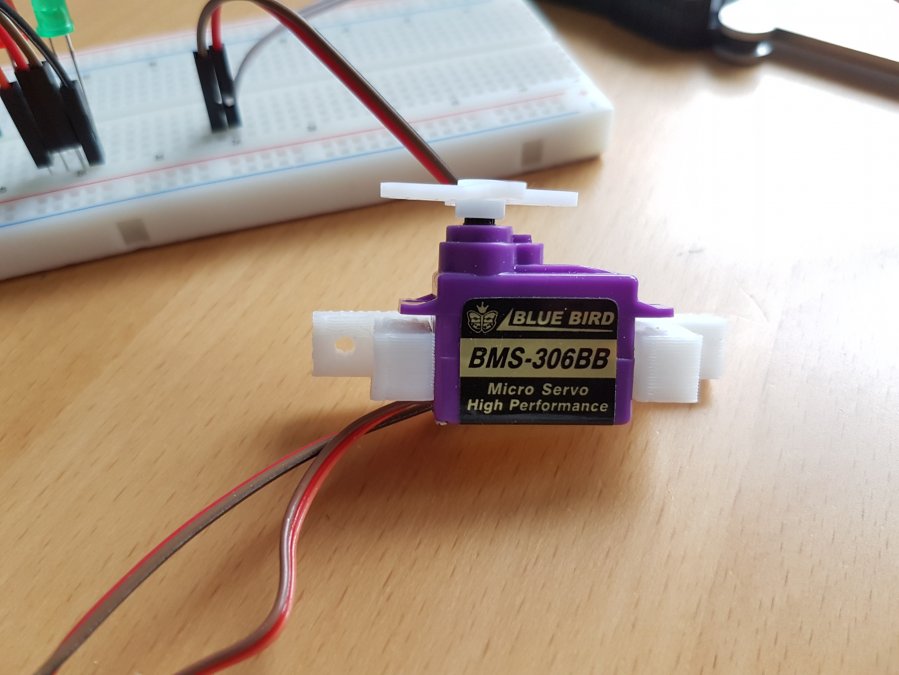
- Servomotor (Blue Bird BMS-306Bb)
- RFID Module (RC522)
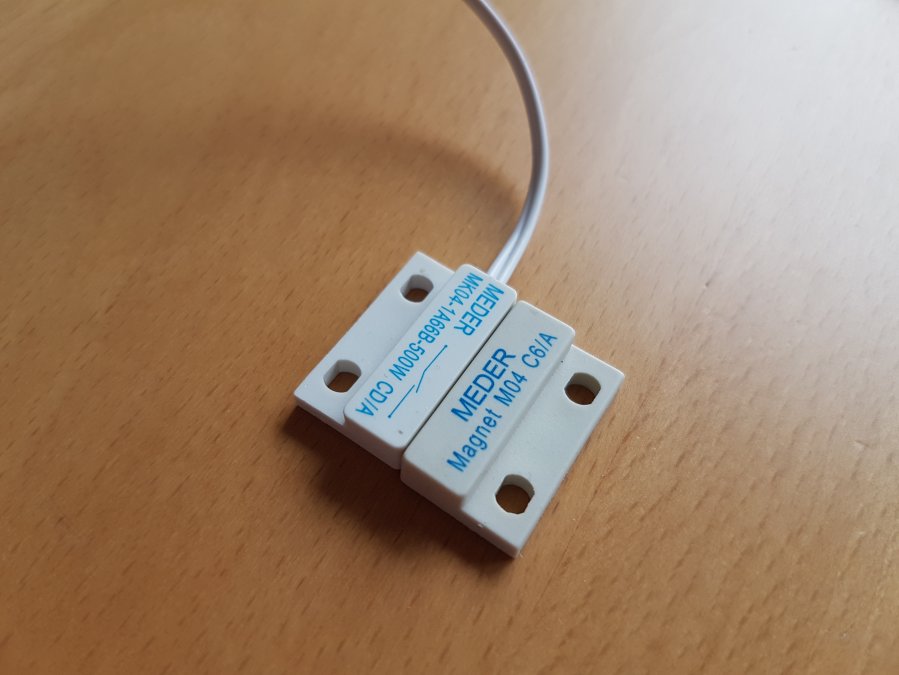
- Reed sensor
- DC Jack
- Power supply
- Micro-USB-"cable"
- 2 x 220Ohm Resistors
- 1 x 4,7kOhm Resistor
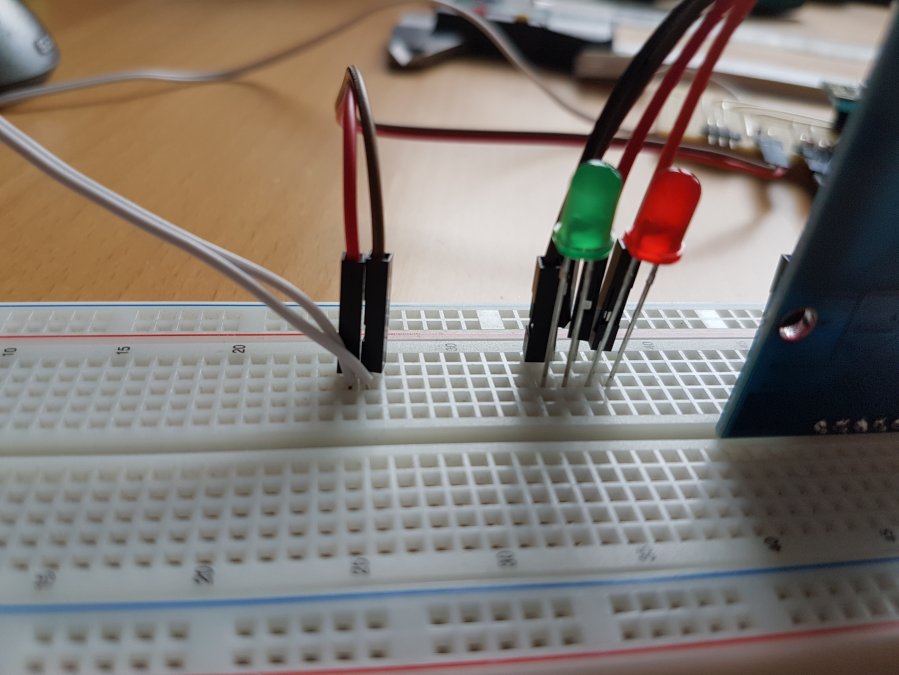
- 2 x LED (red + green)
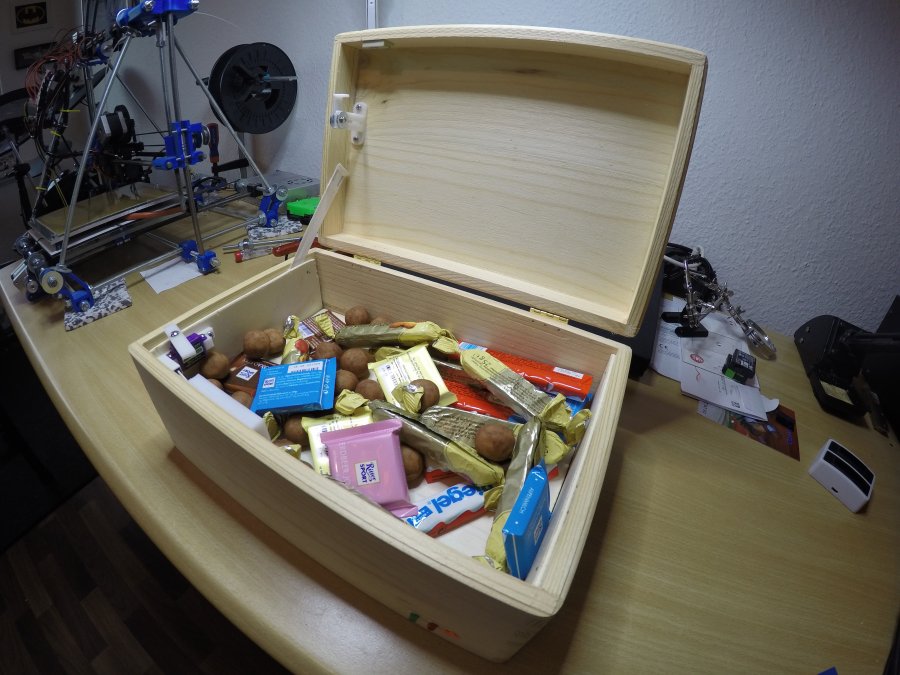
- and a crate of cours (If you take a look at the video below, you'll see a 6 Eur crate, which I bought at "toom". But i couldn't find a correct link.)
Hint: The RFID module works with 3.3V only. 5V will destroy it.
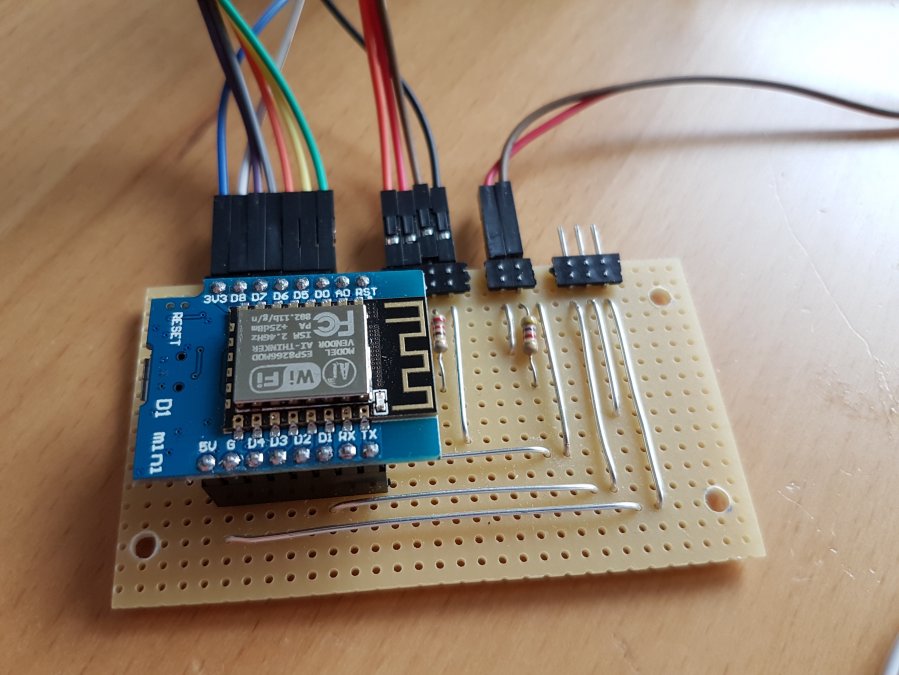
Connect the components like below:
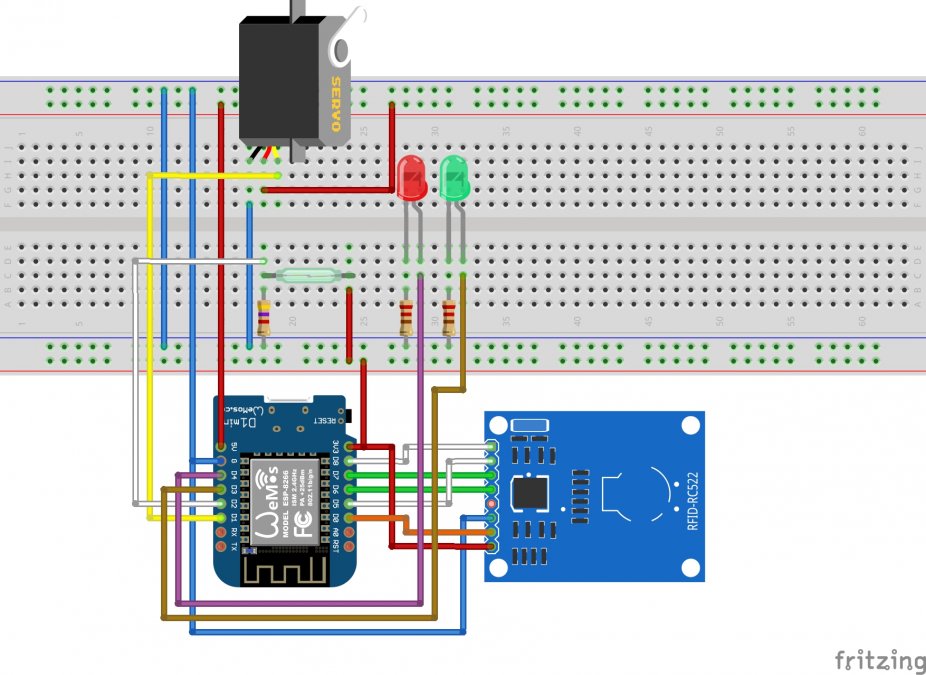
Add 220 Ohm resistors to the LEDs and a pullUp-circuit to the reed sensor (4.7kOhm) onto D2. Connect the red Led to D4, green to D3.
The servo gets extra 5v and its signal at D1.
Connect the RFID module like written in the following table:
| Wemos D1 | RC522 |
|---|---|
| 3.3V | 3.3V |
| G | GND |
| D0 | RST |
| D5 | SCK |
| D6 | MISO |
| D7 | MOSI |
| D8 | SDA |

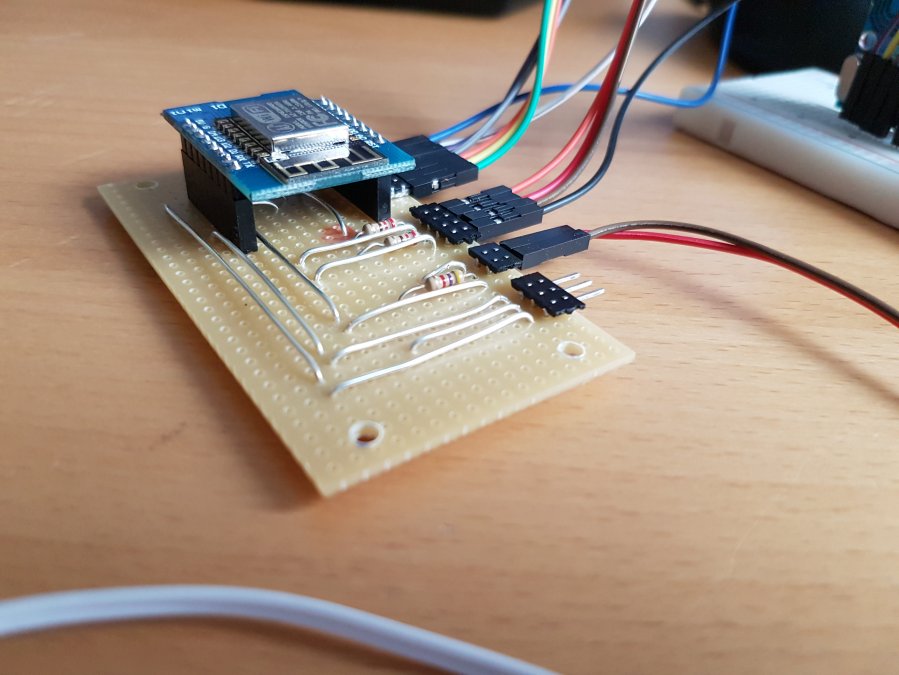
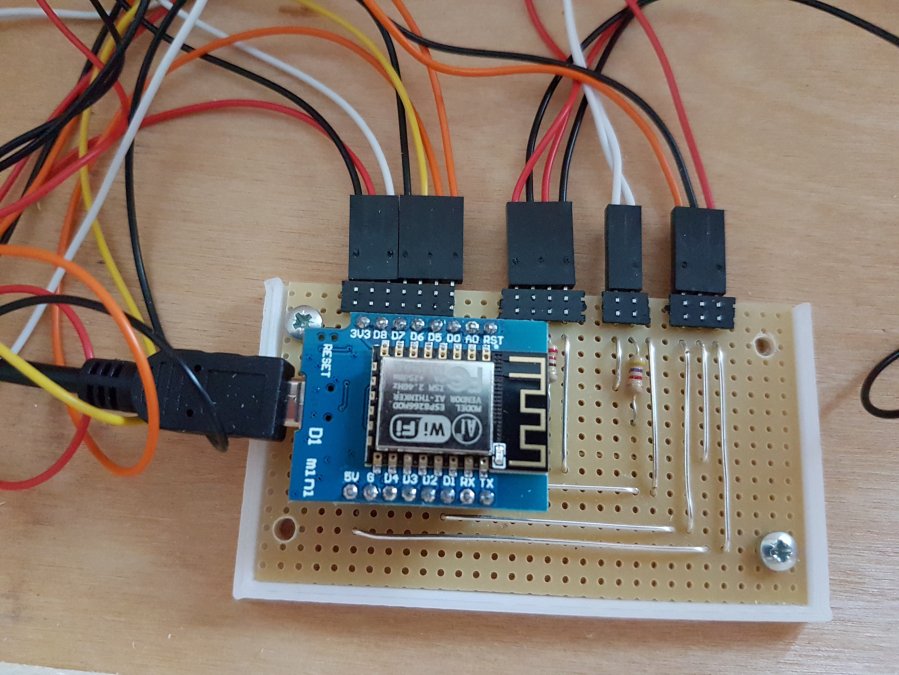
After some soldering, the finished board should look like something like this:

To hold every piece in place, I printed some parts myself. If you want to have a look or even download them, you can do so on Thingiverse.com

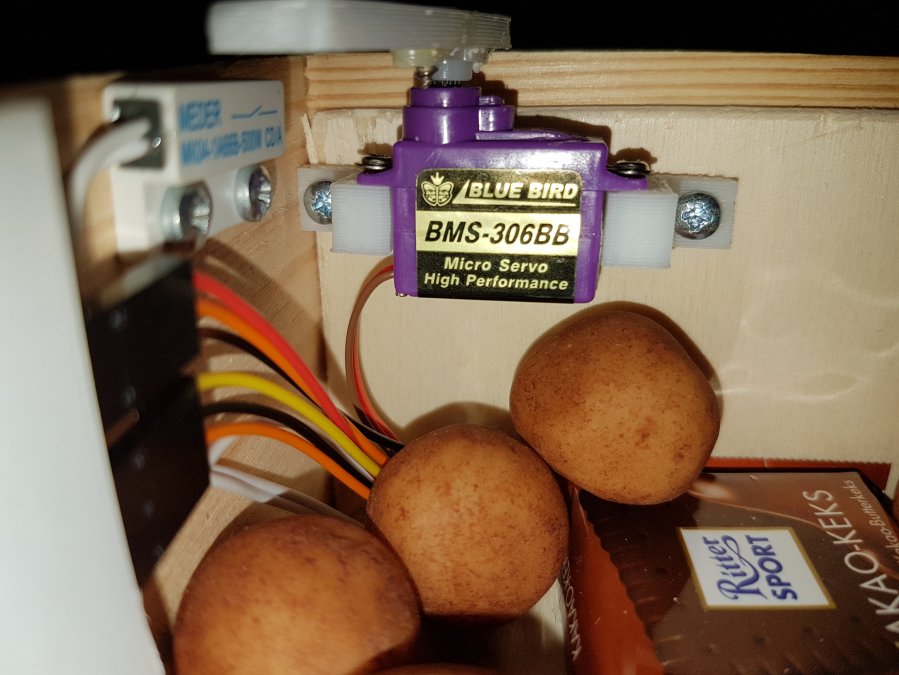
The servo has to be put into the fitting model and needs two screws on each side. Slide the RFID module between it's printed model and the wall of the crate. Add some screws, so that the model holds the module at the wall.
Just mount the reed sensor with two screws where ever you want. It just has to work, when the lid gets closed.
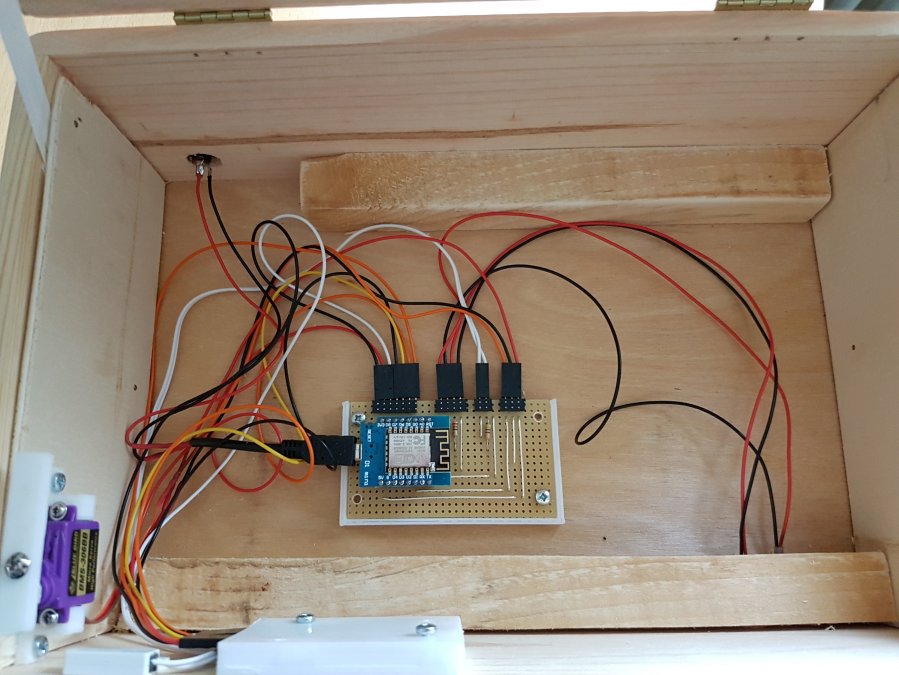
I mounted the servo and the sensor in the same corner, to have everything in the same neighbourhood:

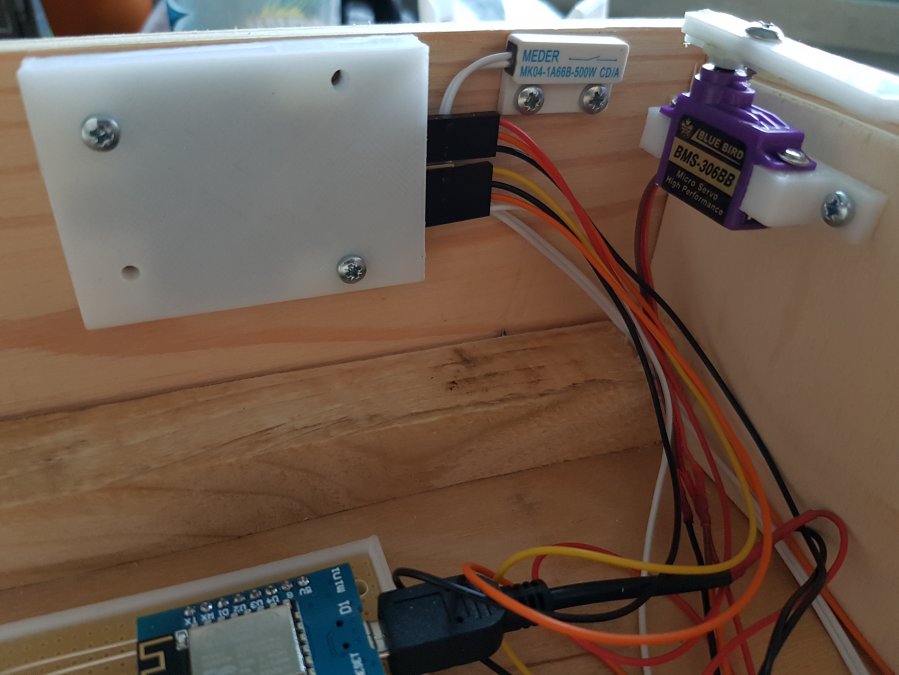
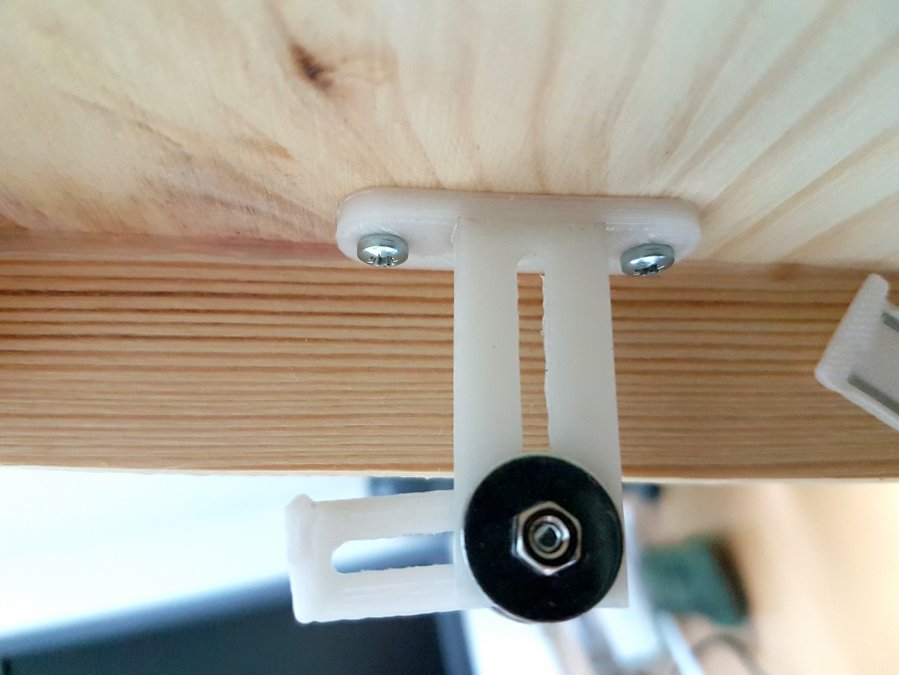
As you see, i have added a printed piece to the servo. This part got mounted with some glue and a screw, so that it blocks the lid, if the crate is locked.
The counterpart consists out of three pieces: Glue the groundplate to the middlepiece with some acetone. The third part is mounted with a screw, some washers and a nut. I just choose this solution to adjust the angle and distance. It works great. Thanks brain! Just mount the part to the lid.
All wires end up between booth wooden base plates and get connected to the soldered board:
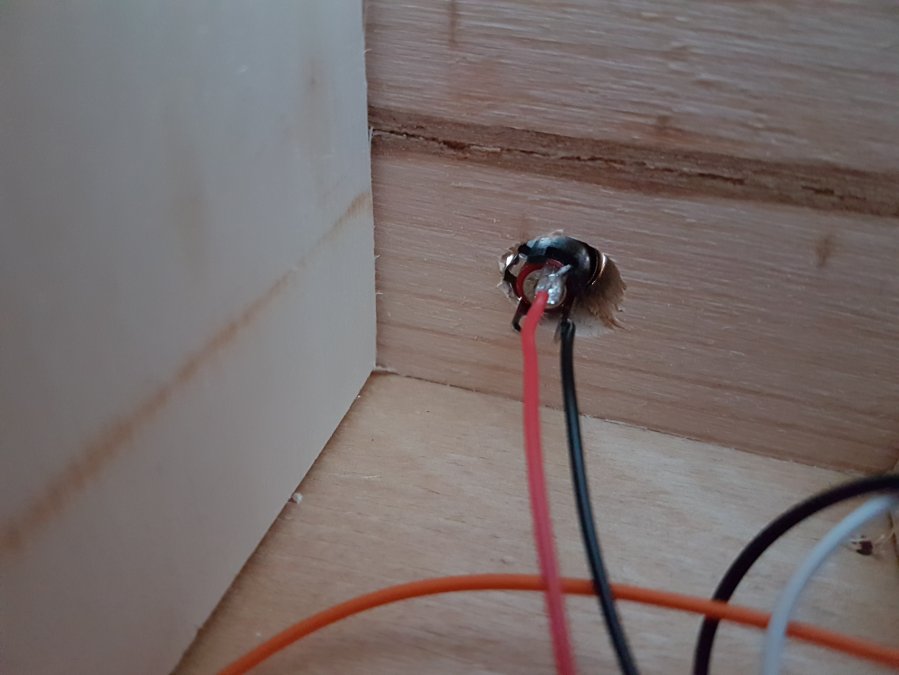
To mount the DC jack onto the box, I added an adapter plate. Just put it onto the jack and tighten the nut. Screw the plate to the case. You should solder the wires before, otherwise it could get a little bit tight. Add the MicroUSBJack and we finished the hardware parts.

Ouh. The software is still missing.
Arduino Code
/* BunteKiste Source.
Some code to handle a crate full of sweets, to open and close it via RFID tokens
by Christian Figge - info ät flazer punked net (flazer.com)
*/

#include <Arduino.h>
#include <SPI.h>
#include <MFRC522.h>
#include <Servo.h>
#include <ESP8266WiFi.h>
#include <ESP8266WiFiMulti.h>
#include <ESP8266HTTPClient.h>

ESP8266WiFiMulti WiFiMulti;

//RFID SPI
#define RST_PIN  D0
#define SS_PIN   D8

//SERVO
#define SRV_PIN  D1

//REED SWITCH
#define REED_SW  D2


//STATUS LEDS
#define LED_RED  D4
#define LED_GRN  D3

MFRC522 mfrc522(SS_PIN, RST_PIN);

boolean doorState = false;
boolean isOpen = false;
int loopWaitDoorCheck = 0;
int blameCount = 0;

Servo servo;

/**
 * Initialize.
 */
void setup() {
    Serial.begin(57600);
    while (!Serial);
    SPI.begin();
    mfrc522.PCD_Init();

    WiFiMulti.addAP("YOUR_AP_SSID", "YOUR_AP_PASSWORD");

    servo.attach(SRV_PIN);
    pinMode(REED_SW, INPUT);
    pinMode(LED_RED, OUTPUT);
    pinMode(LED_GRN, OUTPUT);

    //Just light both LEDs for 2 secs
    displayWelcome();
    displayBlame();
    delay(2000);
    ledsOut();

    handleServo(false);
    doorState = getCurrentDoorState();
}

/**
 * Main loop.
 */
void loop() {
    delay(100);
    if(waitForDoorStatusChange()) {
        delay(2000);
        if(!doorState) {
            if(isOpen) {
                handleServo(false);
                isOpen = false;
                ledsOut();
            }
        }
    }

    if(blameCount > 0) {
        blameCounter();
    }

    // Look for new cards
    if (!mfrc522.PICC_IsNewCardPresent())
        return;

    // Select one of the cards
    if (!mfrc522.PICC_ReadCardSerial())
        return;

    MFRC522::PICC_Type piccType = mfrc522.PICC_GetType(mfrc522.uid.sak);

    // Check for compatibility
    if (piccType != MFRC522::PICC_TYPE_MIFARE_MINI
        &&  piccType != MFRC522::PICC_TYPE_MIFARE_1K
        &&  piccType != MFRC522::PICC_TYPE_MIFARE_4K) {
        Serial.println(F("No MIFARE Classic card."));
        return;
    }

    String uid = getID();
    Serial.print("UID: "); Serial.print(uid);
    Serial.println("");

    if(uid != "") {
        if(check(uid)) {
            Serial.println("Simsalabim");
            handleServo(true);
            isOpen = true;
            displayWelcome();
        }else{
            blameCount = 1;
            displayBlame();
        }
    }

    mfrc522.PICC_HaltA();
    mfrc522.PCD_StopCrypto1();
}

/**
 * handles time for showing blame led
 */
void blameCounter() {
    blameCount++;
    if(blameCount > 10) {
      ledsOut();
      blameCount = 0;
    }
}

/**
 * fires green led
 */
void displayWelcome() {
    digitalWrite(LED_GRN, 1);
}

/**
 * fires red led
 */
void displayBlame() {
    digitalWrite(LED_RED, 1);
}

/**
 * just blackout both leds
 */
void ledsOut() {
    digitalWrite(LED_RED, 0);
    digitalWrite(LED_GRN, 0);
}

/**
 * returns current lid's state
 */
boolean getCurrentDoorState() {
    boolean status = false;
    if(digitalRead(REED_SW) < 1) {
        status = true;
    }
  return status;
}

/**
 * checks if status of lid changes
 **/
boolean waitForDoorStatusChange() {
    if(doorState != getCurrentDoorState()) {
        doorState = getCurrentDoorState();
        if(!doorState) {
            Serial.println("CLOSED!!!!");
        }else{
            Serial.println("OPENED!!!!");
        }
        return true;
    }
    return false;
}

/**
 *  Sends request to server
 */
boolean check(String uid) {
    boolean result = false;
    if(WiFiMulti.run() != WL_CONNECTED) {
        Serial.println("NOT CONNECTED!");
        return false;
    }
    HTTPClient http;
    Serial.println("[HTTP] begin...");
    http.begin("http:///PATH_TO_YOUR_CONTROLLSERVER/api/crate/" + uid); //HTTP
    Serial.println("[HTTP] GET...");
    int httpCode = http.GET();
    if(httpCode > 0) {
        Serial.printf("[HTTP] GET... code: %d\n", httpCode);
        Serial.println("");
        if(httpCode == HTTP_CODE_OK) {
            String payload = http.getString();
            Serial.println(payload);
            if(payload == "granted") {
                result = true;
            }
        }
    }else{
        Serial.printf("[HTTP] GET... failed, error: %s\n", http.errorToString(httpCode).c_str());
    }
    http.end();
    return result;
}

/**
 * Handles Servo to open/close the crate
 */
void handleServo(boolean direction) {
    int pos;
    if(direction) {
        for(pos = 0; pos <= 120; pos += 1) {
            servo.write(pos);
            delay(1);
        }
    }else if(!direction) {
        for(pos = 180; pos>=0; pos-=1) {
            servo.write(pos);
            delay(1);
        }
    }
}

/**
 * Get Uid and transform to uppercase
 */
String getID(){
    String code ="";
    for (byte i = 0; i < mfrc522.uid.size; i++) {
        code += String(mfrc522.uid.uidByte[i], HEX) + ":";
    }

    code.remove(code.length()-1);
    code.toUpperCase();
    return code;
}

/**
 * Helper routine to dump a byte array as hex values to Serial.
 */
void dump_byte_array(byte *buffer, byte bufferSize) {
    for (byte i = 0; i < bufferSize; i++) {
        Serial.print(buffer[i] < 0x10 ? " 0" : " ");
        Serial.print(buffer[i], HEX);
    }
}
Just some information about the code:
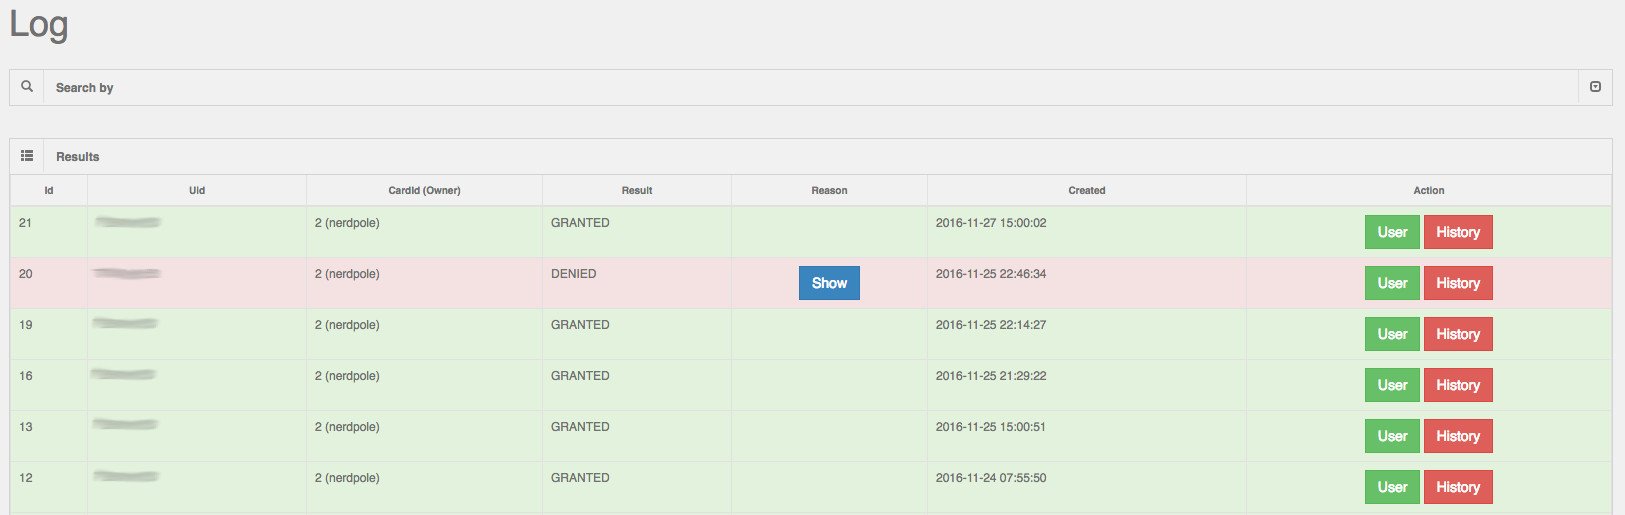
The Arduino sends, after it found a card, a request via WIFI to an API (website). The API takes 2 parameters: The type of lock (crate) and the UID of the token/card. Now the server is checking, if it is a known token and how much the crate got opened today. If the limit is reached, or the token is unknown, the API will answer "denied". If everything is okay, it will send an "granted".
The code is no masterpiece, this is because of: - My absolute inability to write clean code - My failure to understand C - The underestimation of time and then I had to hurry
You have to change the following parts:
- YOUR_AP_SSID - Name of your WIFI
- YOUR_AP_PASSWORD - WIFI's password
- PATH_TO_YOUR_CONTROLLSERVER - API's URL
The code will not work. You have to install the RFID library first.
You'll find it on Github: https://github.com/miguelbalboa/rfid.
Just download the "Master", unzip and copy it to Arduino's "libraries"-folder. Remove the "-master" from the folder's name.
To programm the board, you also have to install the driver, because the WeMos D1 doesn't use the standard FTDI chip. Instead the used chip is an "CH340G". I found the driver for windows here:
http://www.arduined.eu/tag/ch340g/ for Mac at Björns Blog: https://blog.sengotta.net/arduino-nano-wird-nicht-erkannt-was-tun/.
But we need some more stuff: We have to add the new board to the Arduino IDE as well. So just add the following URL to the "Additional Board Manager URLs" in settings:
http://arduino.esp8266.com/stable/package_esp8266com_index.json

If the URL shouldn't work in future, you should take a look at it's repo:
https://github.com/esp8266/Arduino
Now you have to download the package via Arduino's board manager. You are able to do this, by clicking on "Tools -> Board -> Boardmanager". Search for ESP8266 and click on "install". This will take a while. Afterwards you can choose a lot more boards:
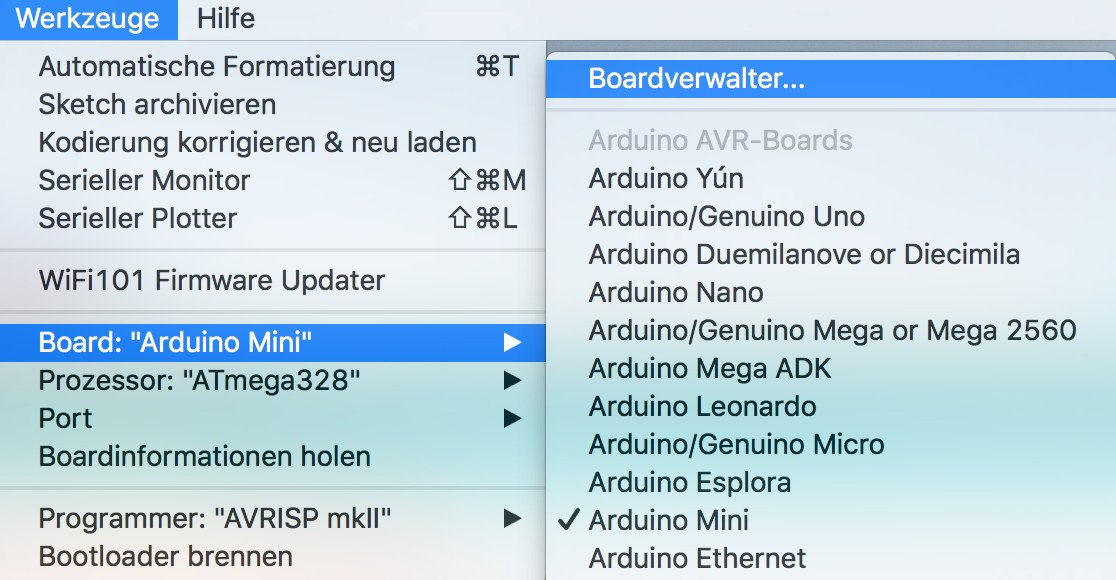

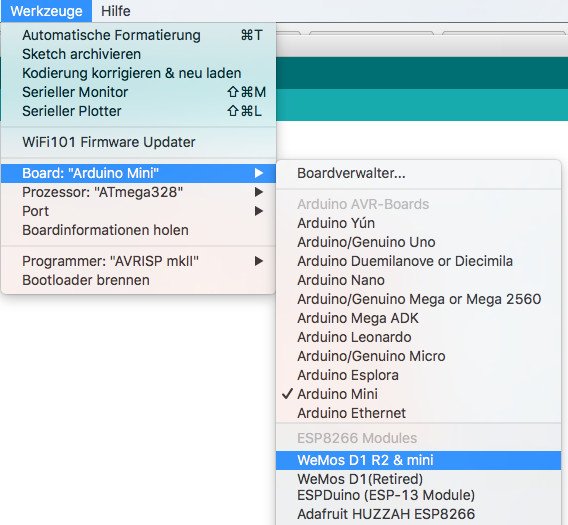
Yeah! Now we are able to compile and upload the code.
Unfortunately I can not publish the code of the API, because I wrote big parts of the backend at work (Jeah, I have a normal job). We needed a cool ACP and so I could mix freetime and work. But if you want to build your own: I used a lot of OpenSource. Here are some information and screenshot about the thing i build myself:
The webserver is an Nginx with a PHP-extension on a Raspberry Pi. I'm using a MariaDB as database. And because I'm tired of writing the same things again and again, I decided to work with Laravel 5.3 as a framework.
The theme is .a free one, called "Matrix".
This got a little bit modified with Bootstrap and some Javascript (JQuery). After some successfull modifications it looks like this:
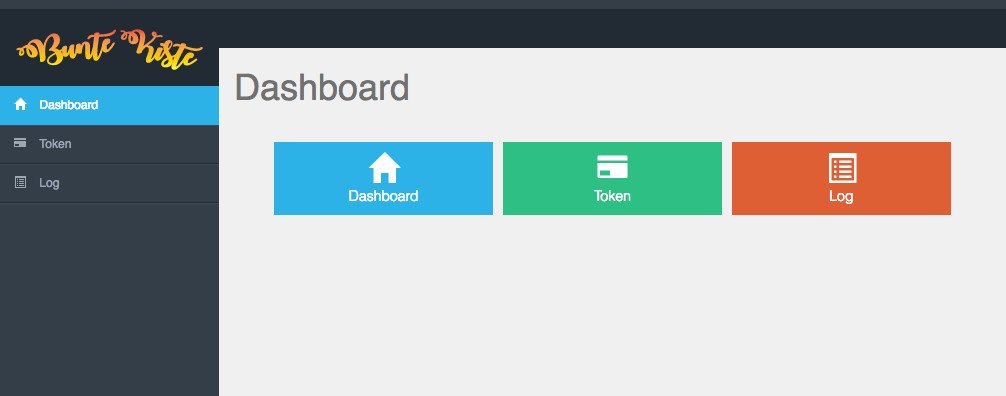

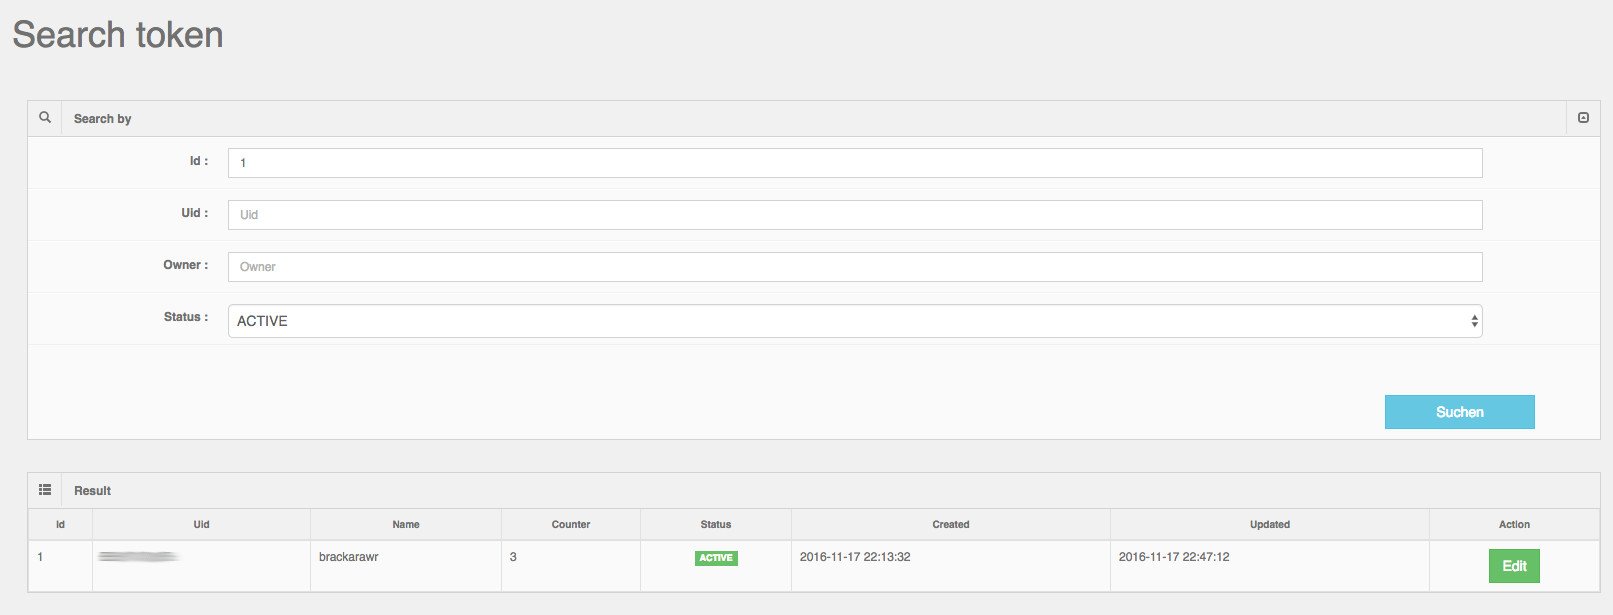
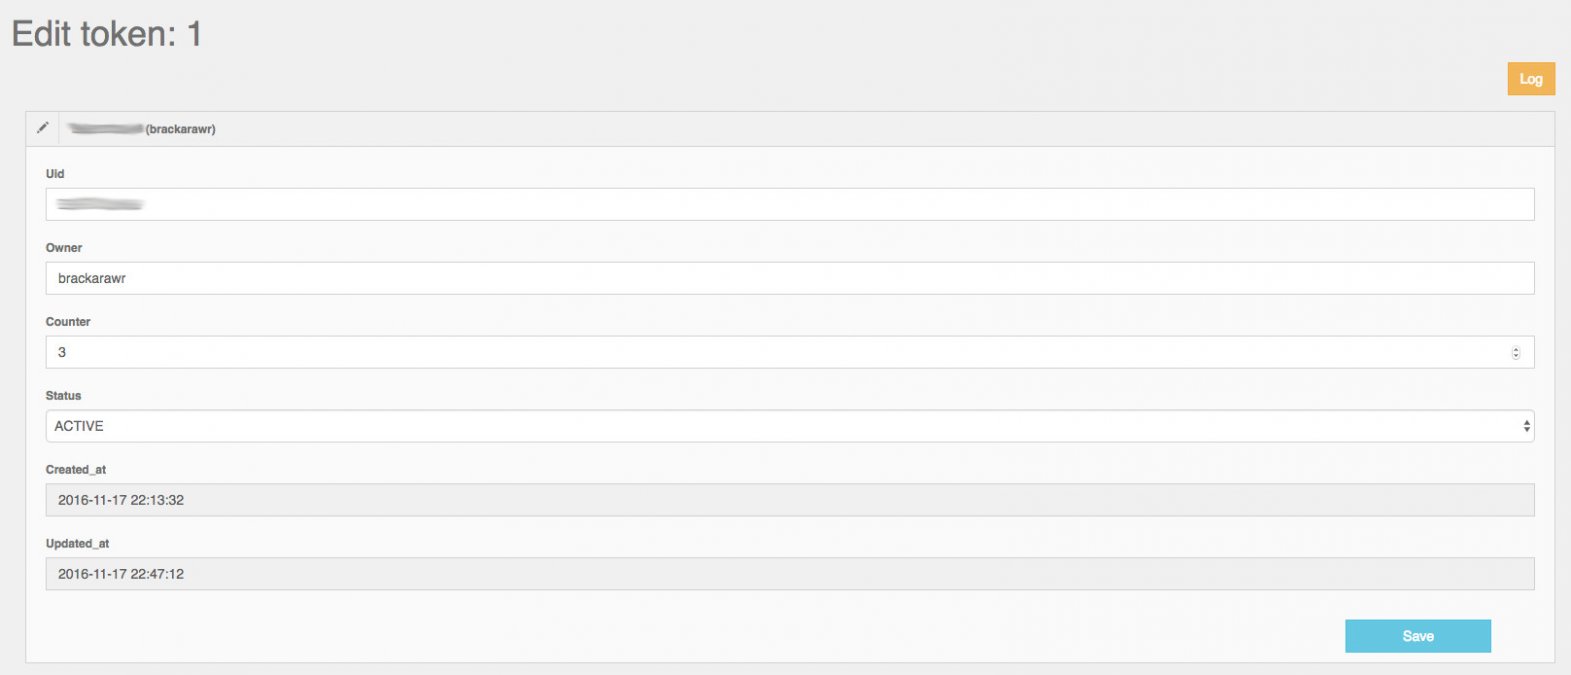
Okay. It's not the nicest one, but it's doing its job.
And because, you should not always just use OpenSource, without giving something back, we have written another Twitter-API. You are nearly able to use this API while you are asleep. If you are interested, you can download or develop it here: https://github.com/FrozenDonkey/twitter-api-php. This code gets used in this project aswell. The crate is tweeting random texts, when somebody tries to open the lid.
How you implement the code?
Really Easy:
- Download it
- Unzip it
- Create a twitter dev account (https://dev.twitter.com)
- Create an app -> https://apps.twitter.com
- Replace the following block in index.php:
$twitter = new TwitterAPI(
    "YOUR_OAUTH_ACCESS_TOKEN",
    "YOUR_OAUTH_ACCESS_TOKEN_SECRET",
    "YOUR_CONSUMER_KEY",
    "YOUR_CONSUMER_SECRET"
);
Now you can tweet just with the following line:
$res = $twitter->tweet("THIS IS YOUR TWEET");
If you want to add an image:
$res = $twitter->tweetImage('THIS IS A TWEET WITH AN IMAGE', 'path/to/image.jpg');
BAM!!!!!
After Bracka added a logo, the box looks like this:

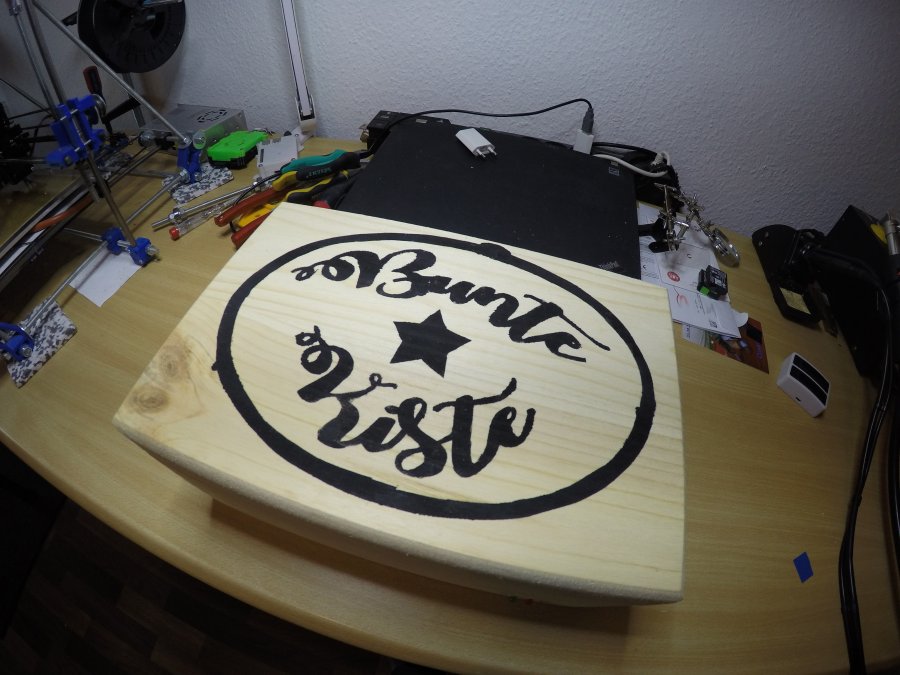
If you want to have a look at the crate's twitter account, just search for @DieBunteKiste. Or click on the link.
And here you see a video of how I built the whole thing: (german only)